|
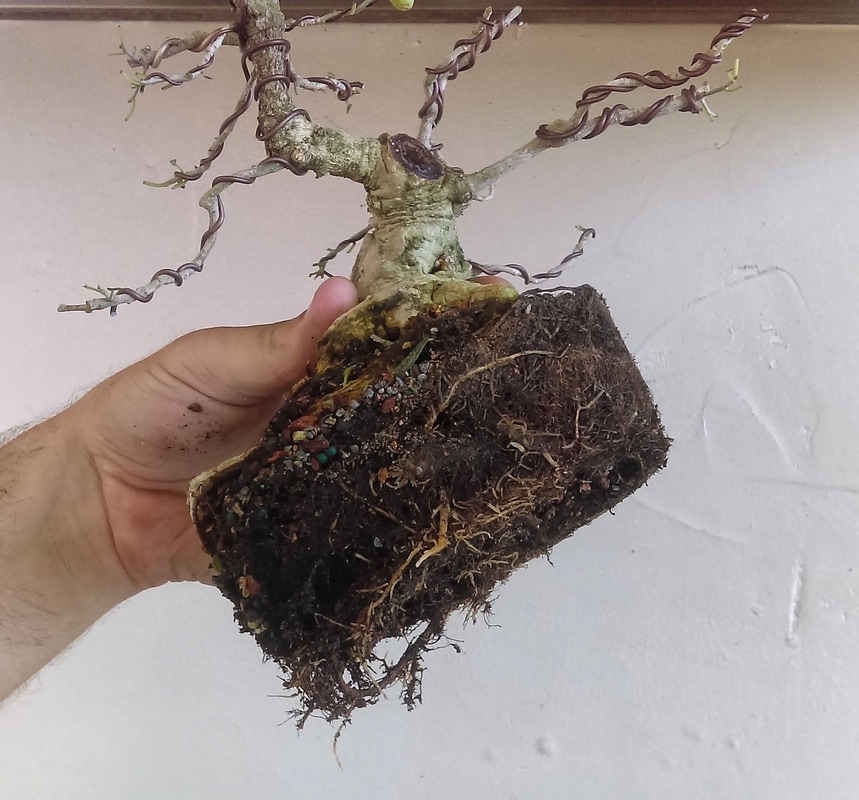
I was over at my new Bonsai friend Ben's house exploring his growing collection of trees. I was there to help him with some trees, teach him some Bonsai technique, and have some laughs. We were walking through his trees and this Burtt davyii nana was a tree that caught my eye. 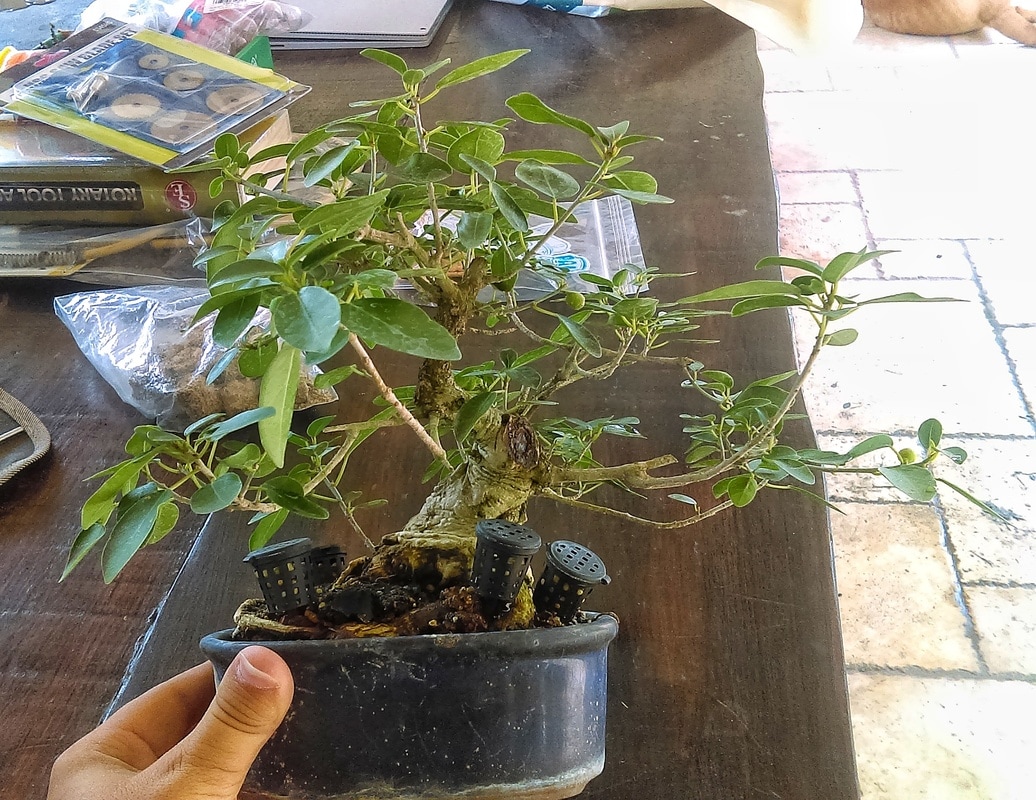 This tree was bought from my good friend Mike Rogers. It was bought because it's a ficus and hard to kill. This tree was begging for some love so I told Ben this tree would be a great way to start the day and teach him a few things. So we got to defoliating and trimming 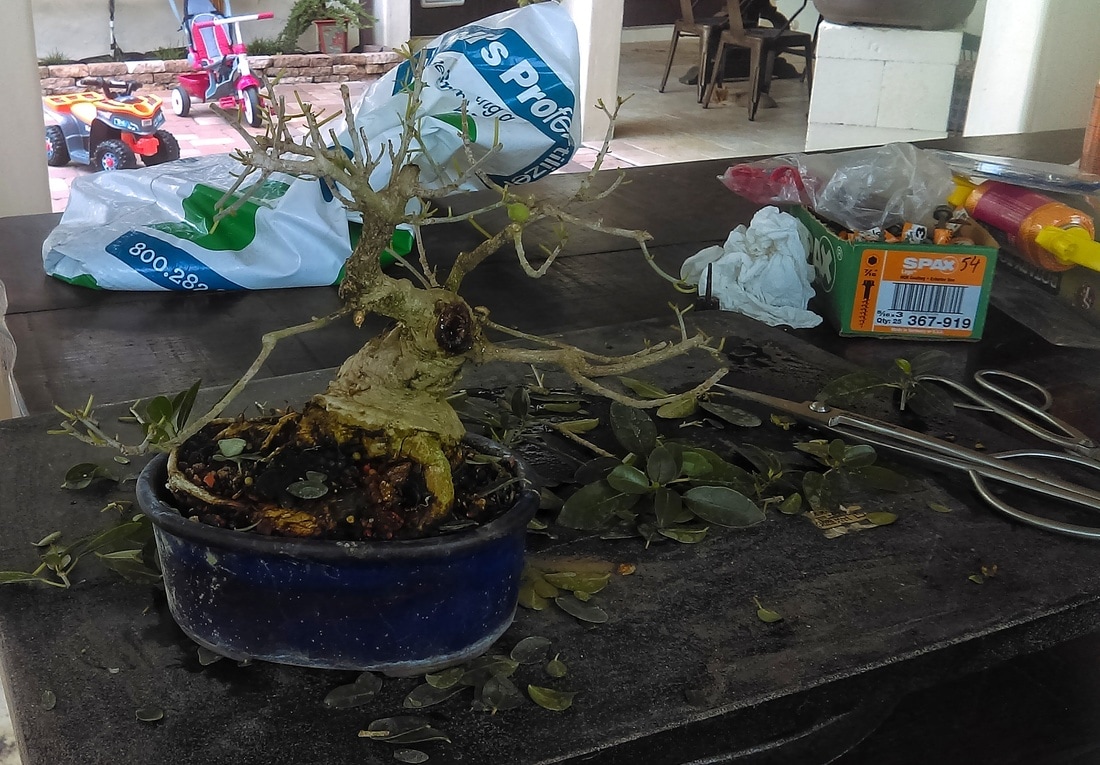 Some ask why defoliate trees. The reason is to be able to see into the tree and make it easier to wire, but to also reduce the size of the leaf. Now it is time for wire and placing branches. 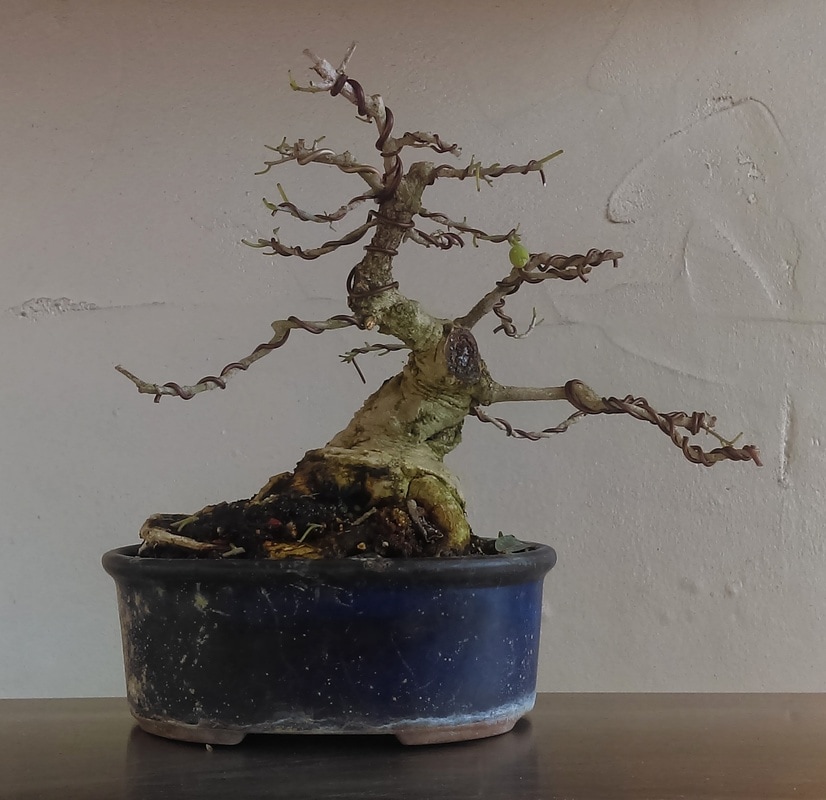 Something I was always taught and I told Ben this, is to do all the tree work in the current pot because if you take the tree out and put it in a new pot then try to move branches... The tree isn't secure in the pot so you will be shaking the tree which isn't good for the tree's roots. Now that all of the tree work is done, lets take the tree out and look at the roots.
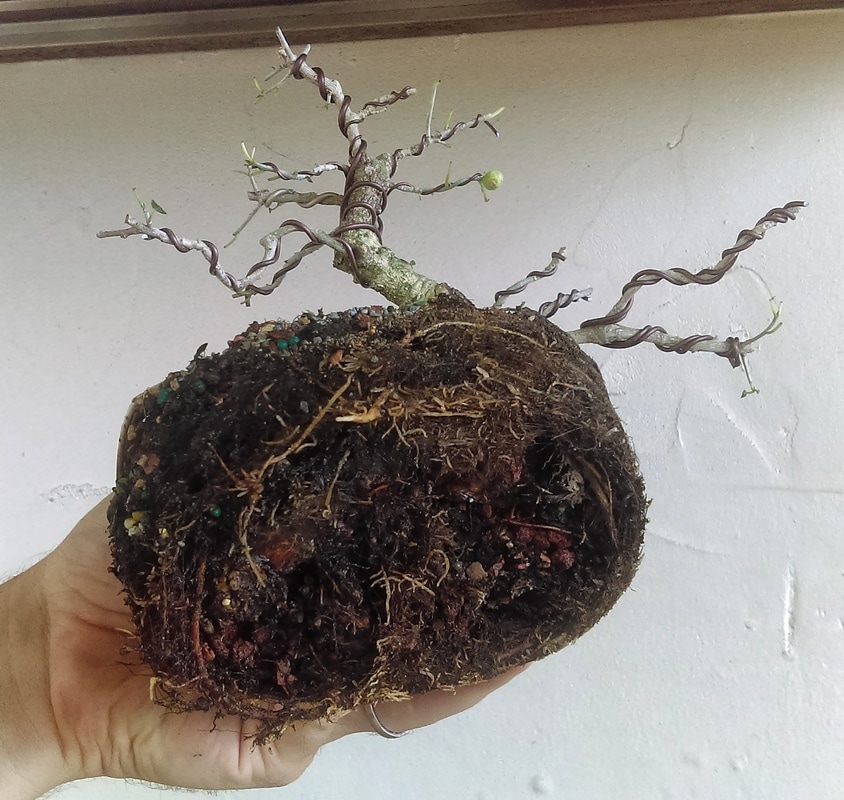
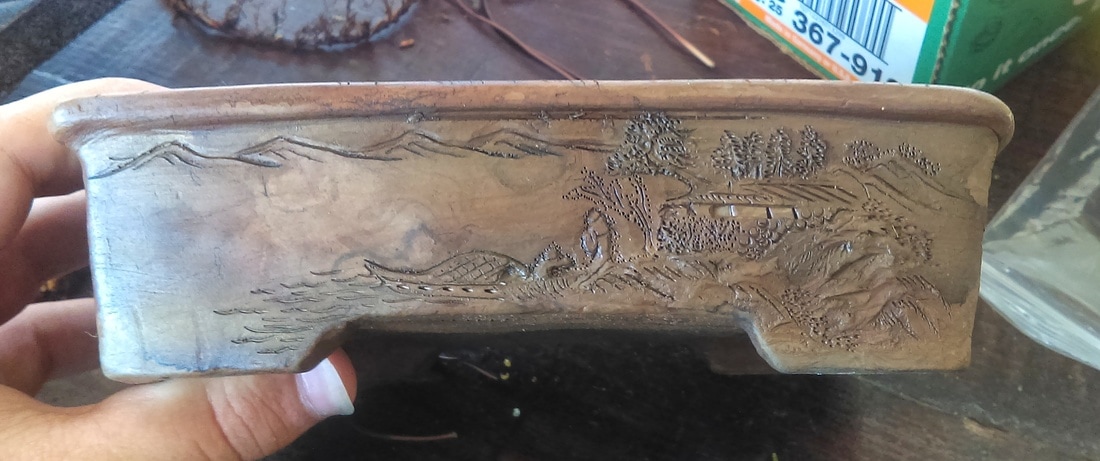
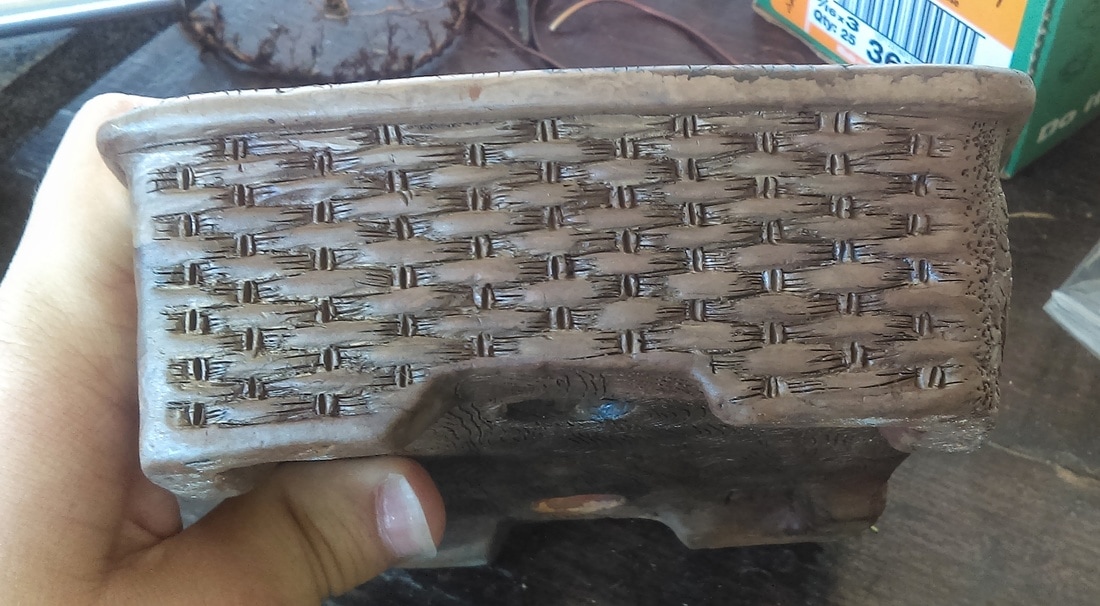
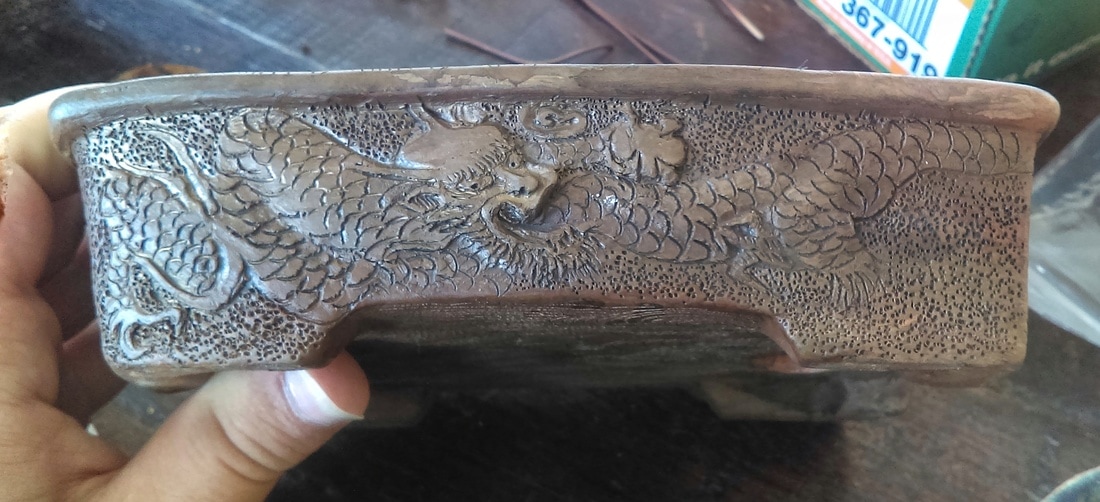
This tree looks like it hasn't been repotted in a few years. The soil is very broken down and is in need of new soil. Lets go to the hose to see what roots we really do have. 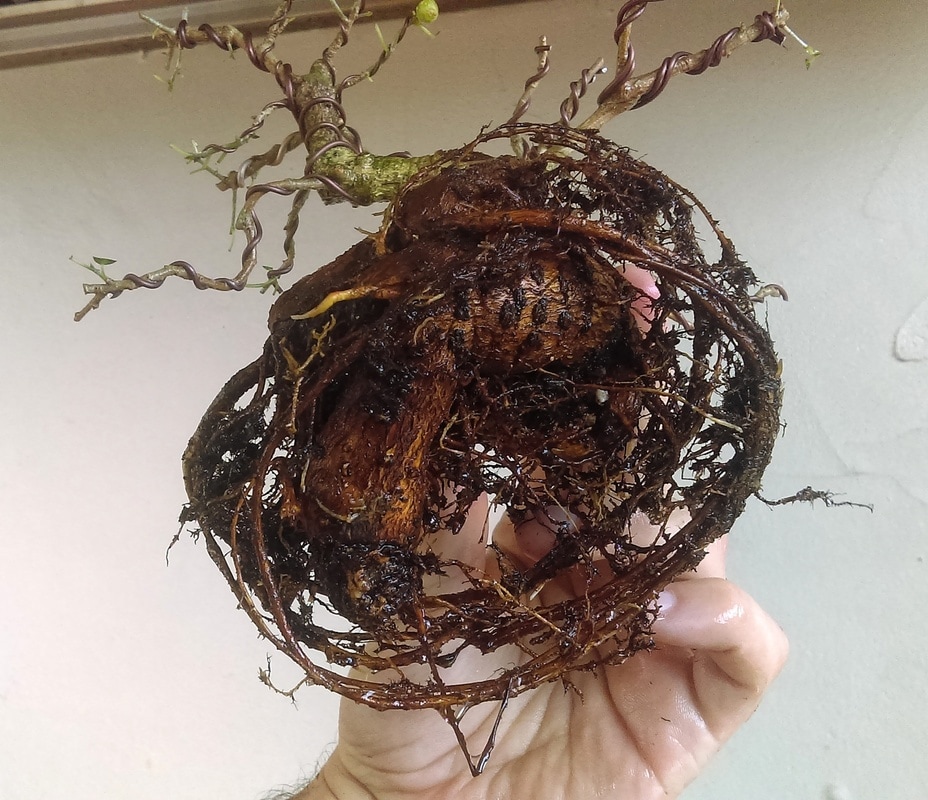 That big tap root needs to go! Then those circling roots. Lets get to cutting! Here is the result 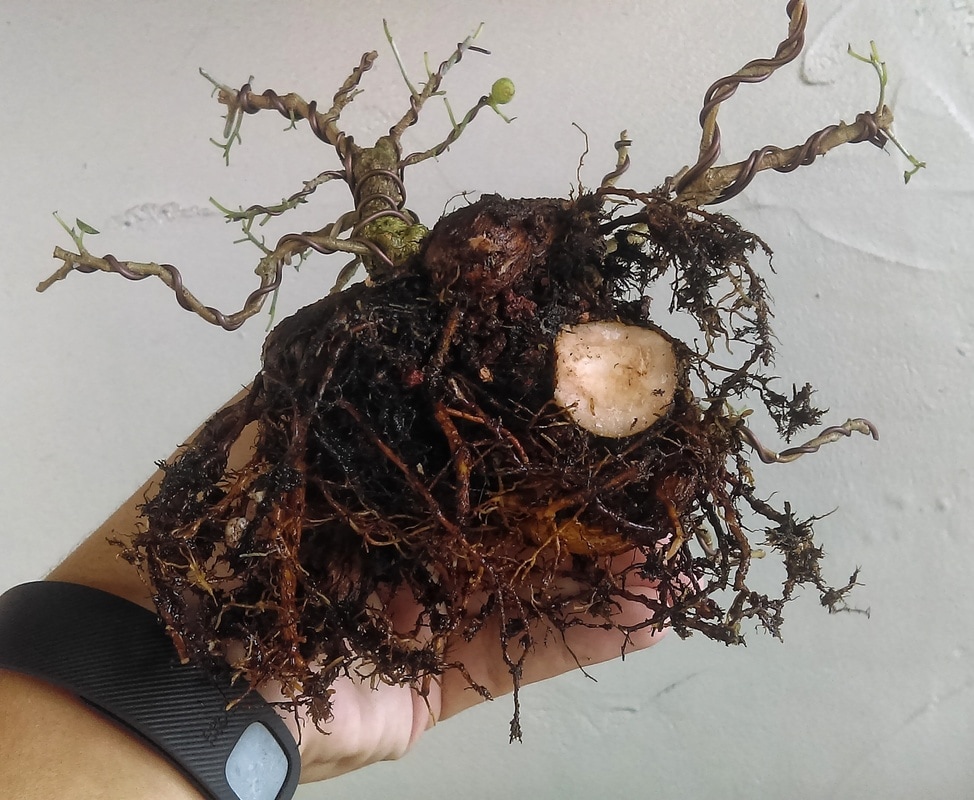 Now it is time to choose a pot. I found this pot. Ben said the pot is by Tani Ranzan and we both agreed that the tree would look great in the pot! Here is the pot. So then I showed him how to tie the tree into this cool pot. Here is how the tree turned out. 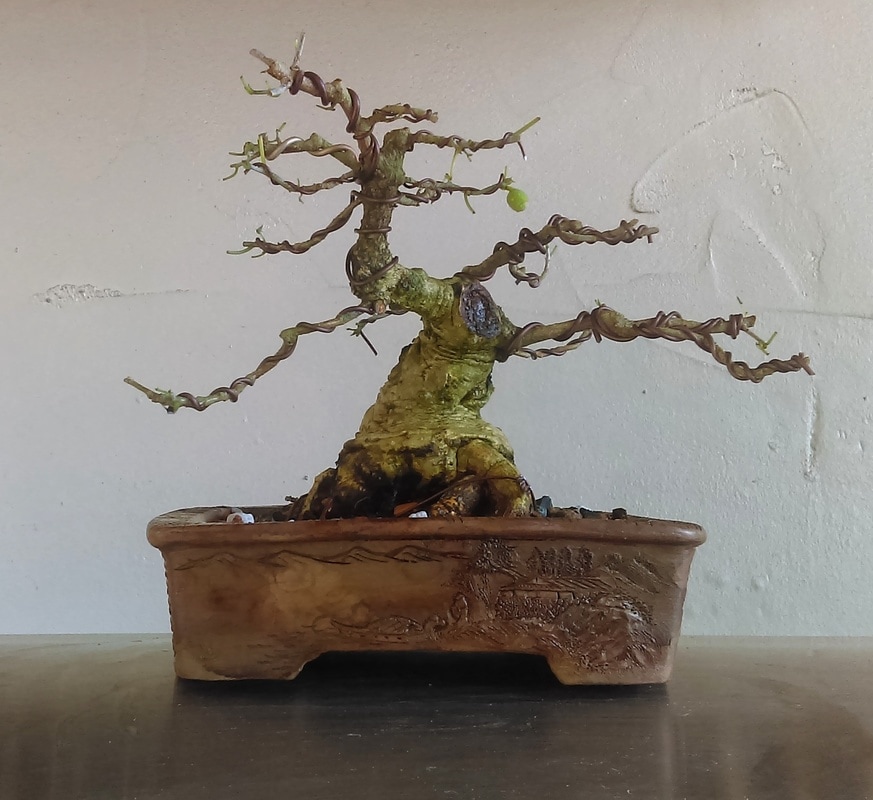 The top of the tree needs to be moved right but I didn't because the tree was cracking. This would give me nice movement. Mike the original owner thought the tree came out nice. Ben and I both were very happy with the result and can't wait to see what it looks like in a few years!
2 Comments
On World Bonsai Day Weekend (May 13-15), I was at my friend Randy Clarks house. We went to a World Bonsai Day celebration at a local nursery and the day after he let me work on some trees. I told Randy that later in may at the Bonsai Convention I am attending, I am doing a styling competition. The species I was going to style is a Procumbens nana Juniper. Since I don't have any juniper I can practice on at home, I asked if I could work on one of his. He picked this one out: 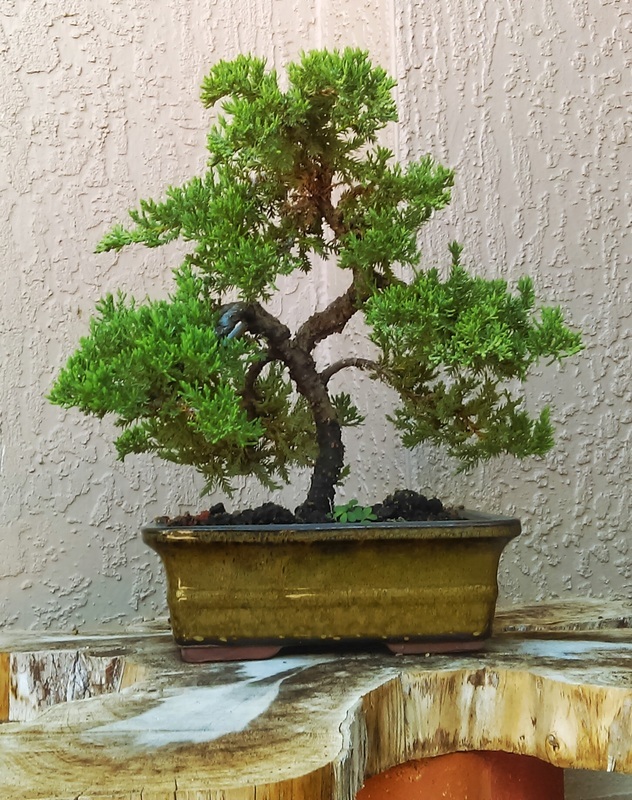 Randy said trim the juniper. So we brought it inside to his studio and I started to trim.  He said start at this pad. He showed me how to trim a juniper since I wasn't 100% sure. He said cut between the little needles shown below. Notice I did not say pinch. Always cut the junipers 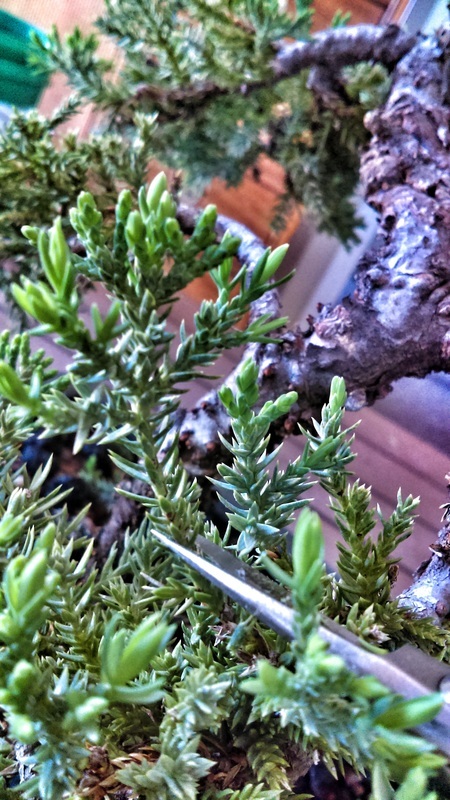 So I trimmed the pad this way also cutting off everything growing straight down. This is how the pad turned out: 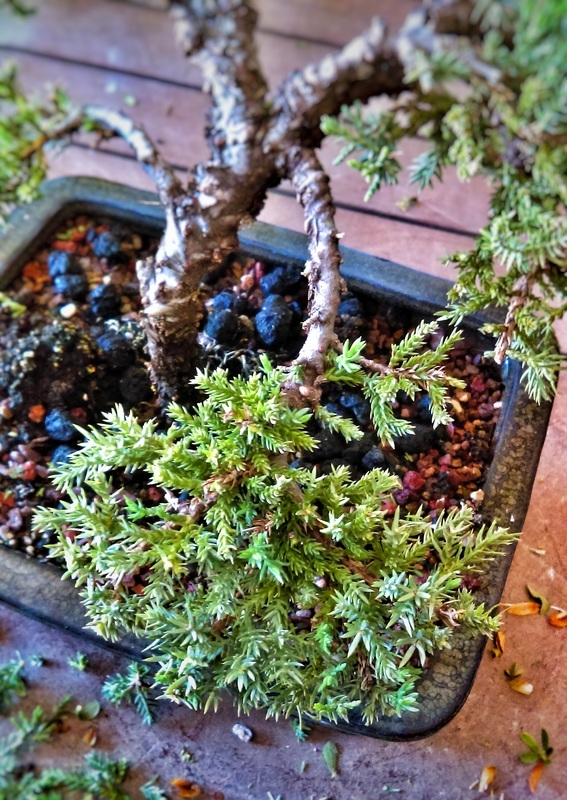 So I trimmed the rest of the tree defining each pad and here is the after: 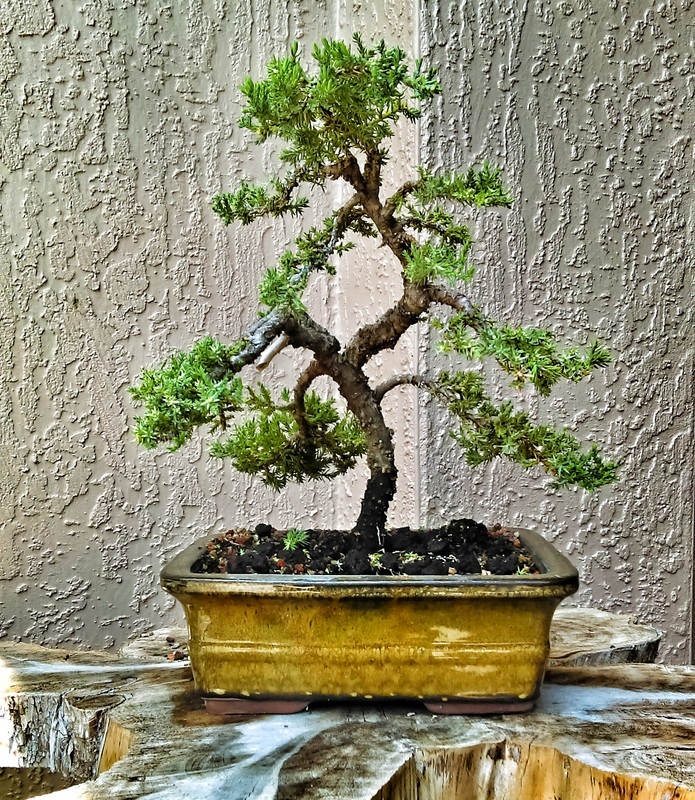 Working on this tree did prepare me for the styling competition later in May. Here is what was given to me to style for the competition: 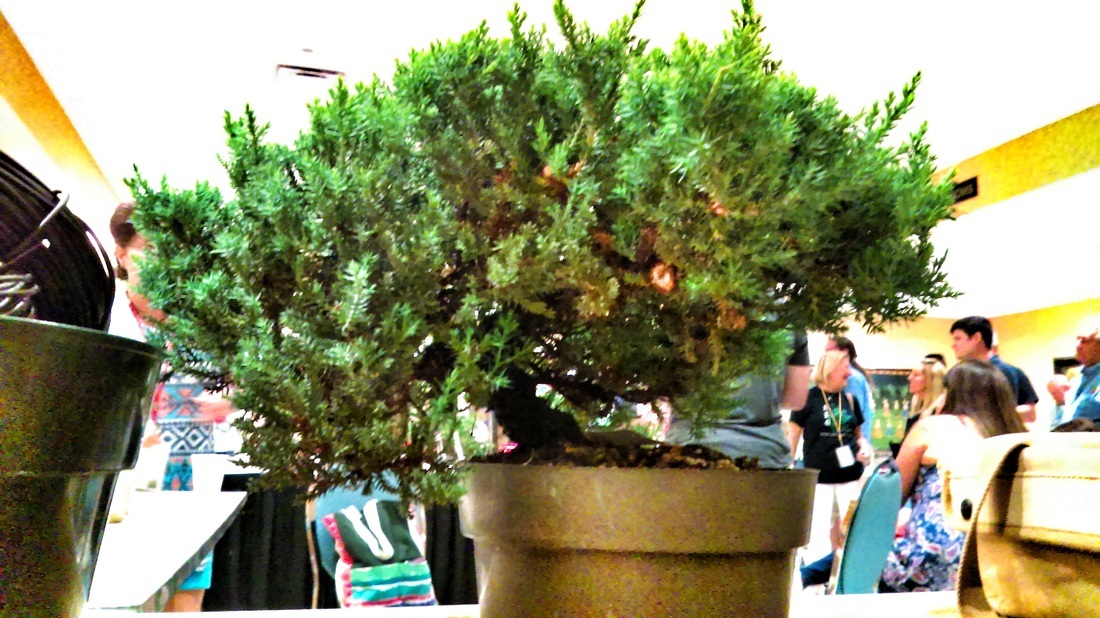 It is always hard figuring out which branches to use when the tree is super full and never been styled before but I think I picked the right branches and padded the tree out nicely. Here is the after:  I feel like I did a really good job on the tree. I even used a friends dremel and took a shot at carving for the first time. Here is a close up of both dead wood features: 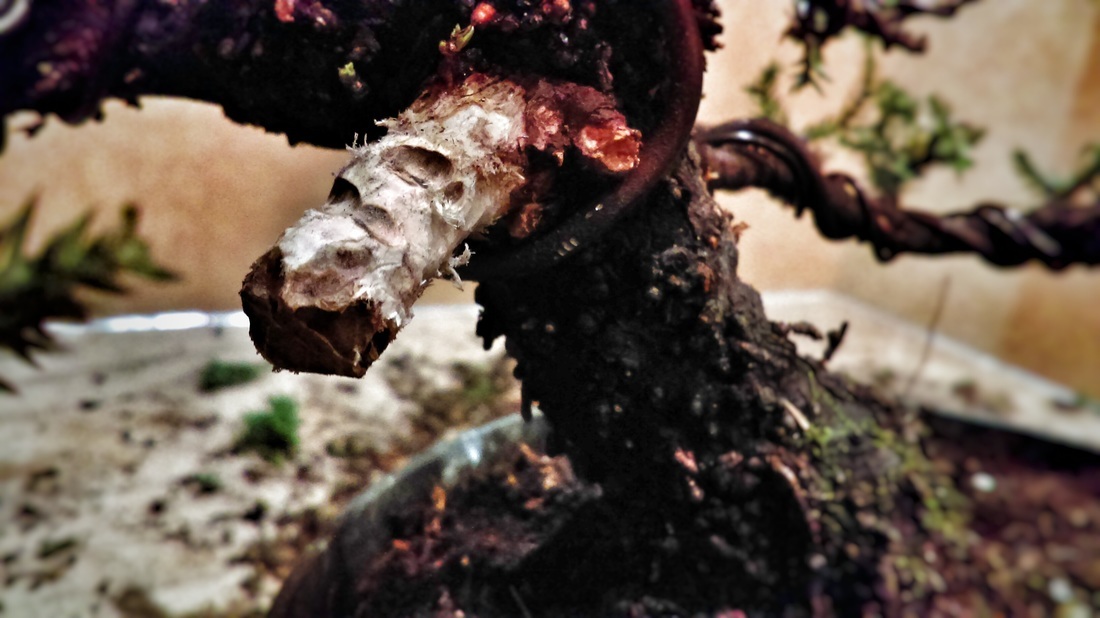 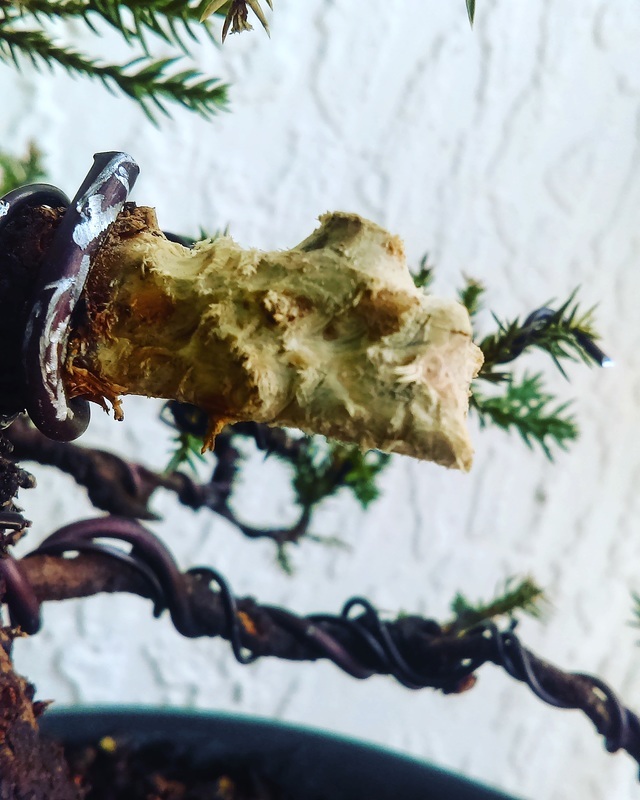 I asked Bjorn Bjorholm to critique the tree and he said I did a very good job. He said I should have left a little more foliage on the tree but otherwise I did very good! Bjorn said my wiring skills are at a B- level, which to me is a big complement! In case you dont know who Bjorn is, here is Bjorn working on a hackberry. 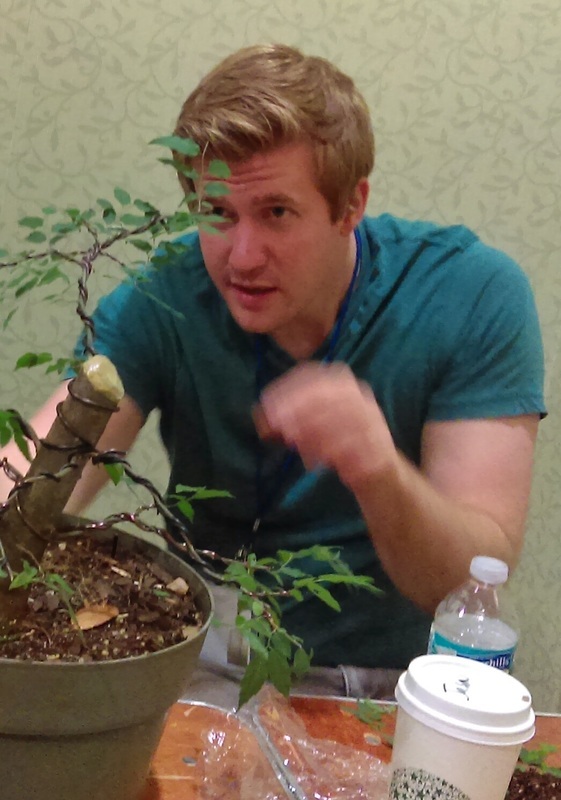 Here is the afters of both Procumbens nana Junipers I worked on in the month of May:  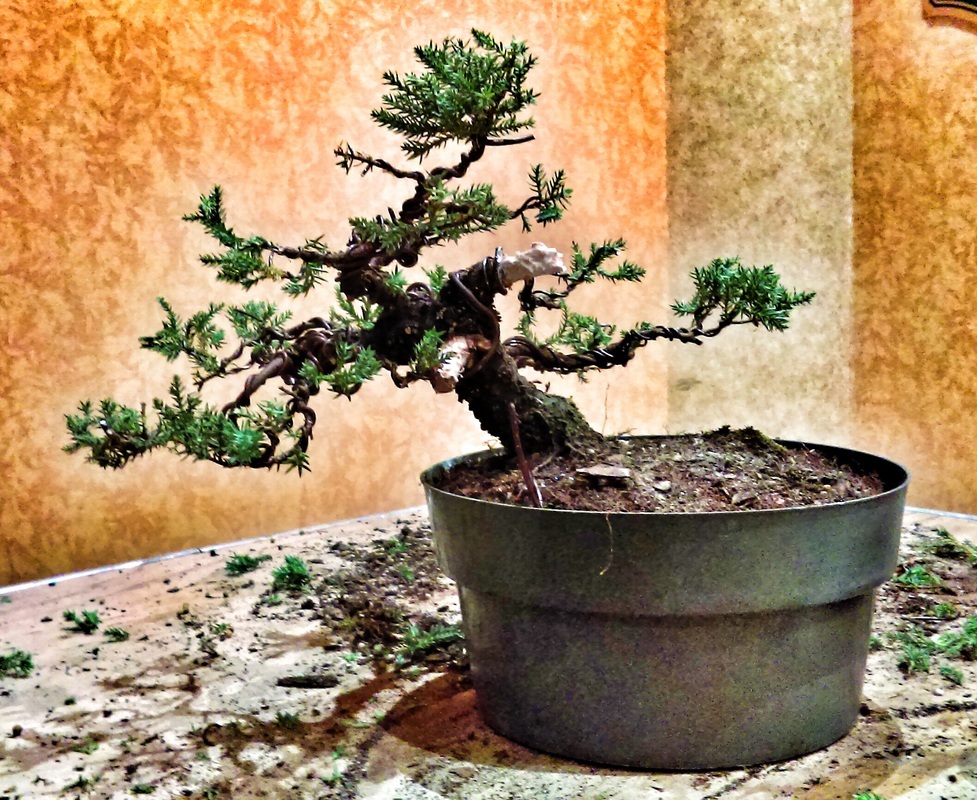 See you next time!
Who remembers this Hackberry root?  If you don't remember this Hackberry root, take a look at this post. This was one of the Hackberry roots my friend Adam gave me from his big Hackberry tree. Below is the big Hackberry my root came from. Check out his post on his tree here. 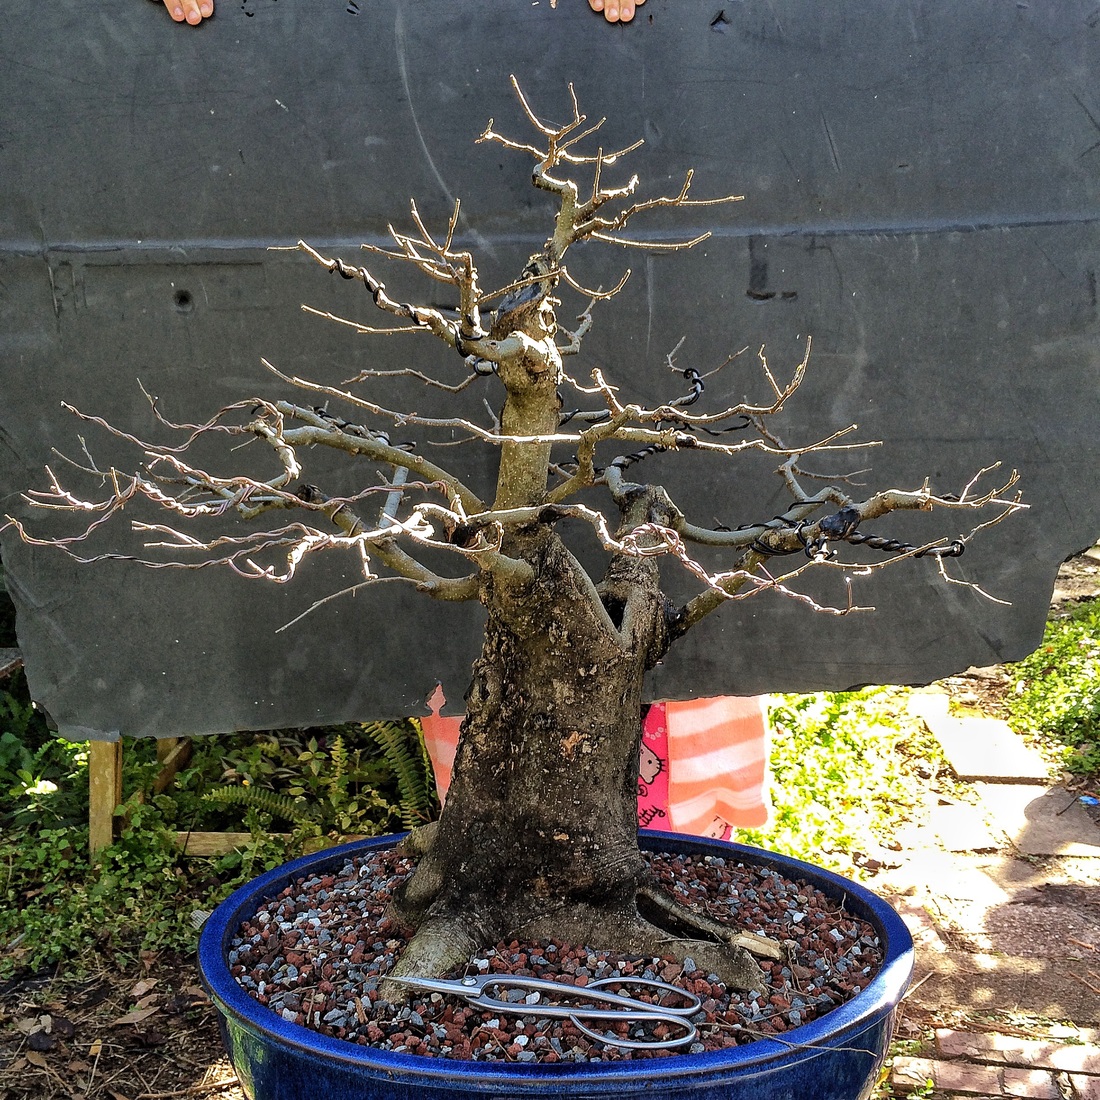 The tree turned out great!! I gave Adam my opinion in the post, you will have to check the post out! I bet it is growing wild right now just like mine are! Alright, to my Hackberry... This Hackberry was one of the survivors of what I got from Adam. It is growing great... Want to see? 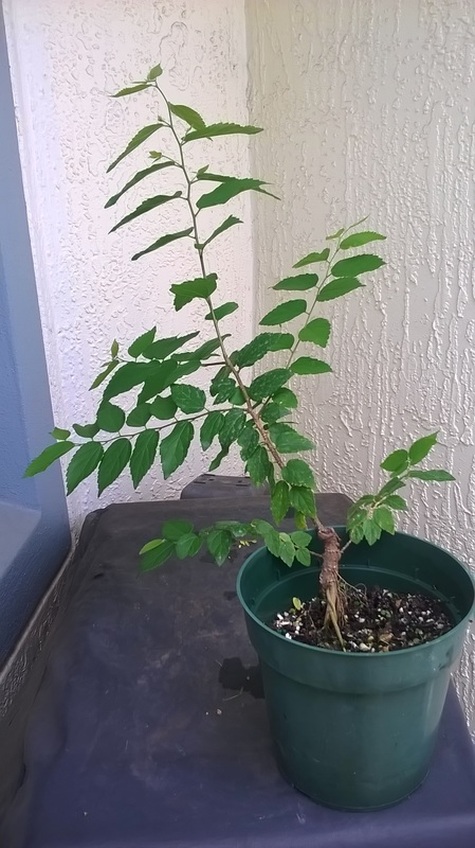 It's grown a lot since January! I have not trimmed on it at all, it has just been left to grow. The trunk is going to be really nice one day... 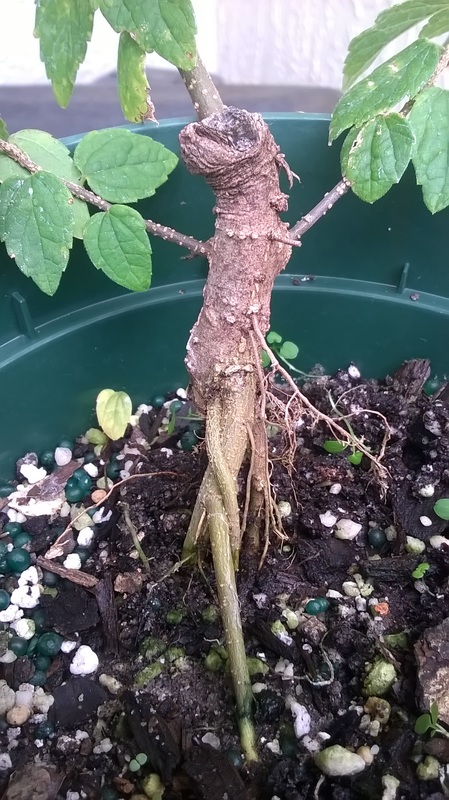 Look at those roots!! Most of those are new since I have put it in it's current pot in January. This Hackberry looks great right now!! I am not going to work on it for a while because I do want the trunk to thicken and I want more branches to pop and grow. The other Hackberry roots are alive but the cutting unfortunately did not make it... I recently pulled the cutting out of the pot and it had no roots. It had dropped it's leaves about a month earlier. The other Hackberry trees are growing a lot but have not grown like this one. That's why I choose this Hackberry to update on. In the future I will update on the others. 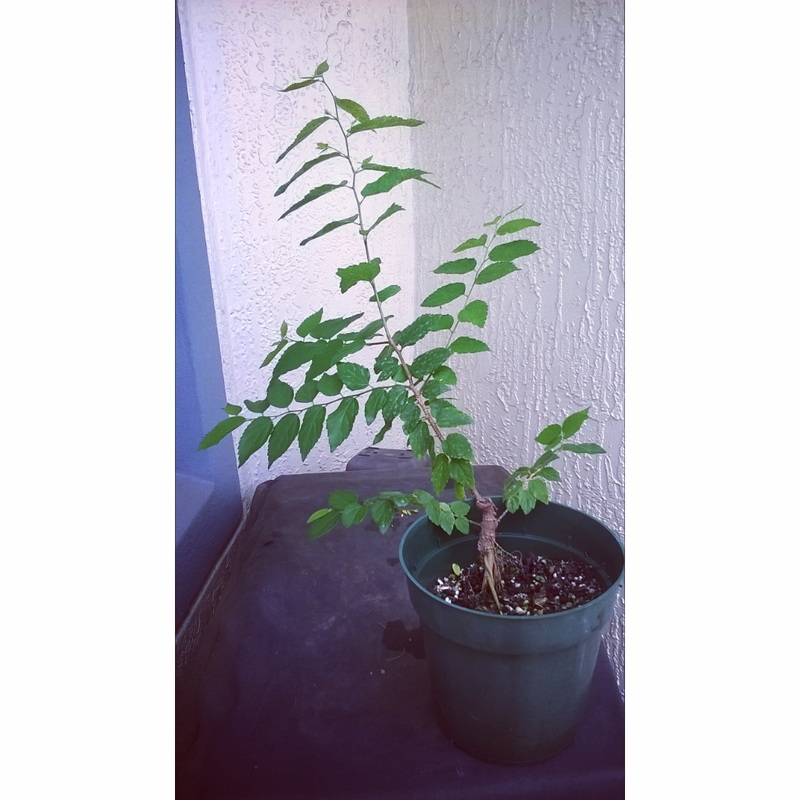 Until next time...
I haven't decided what tree to post next, so you will have to check back and see! Hello Everyone, On Friday the 20th, I was at a bonsai club meeting. While I was there, I found out that my friend Dustin had gotten hurt a little while back and could not work on his tree that he brought along with him. So he asked me for help! Below is an old picture of the tree I will be working on: 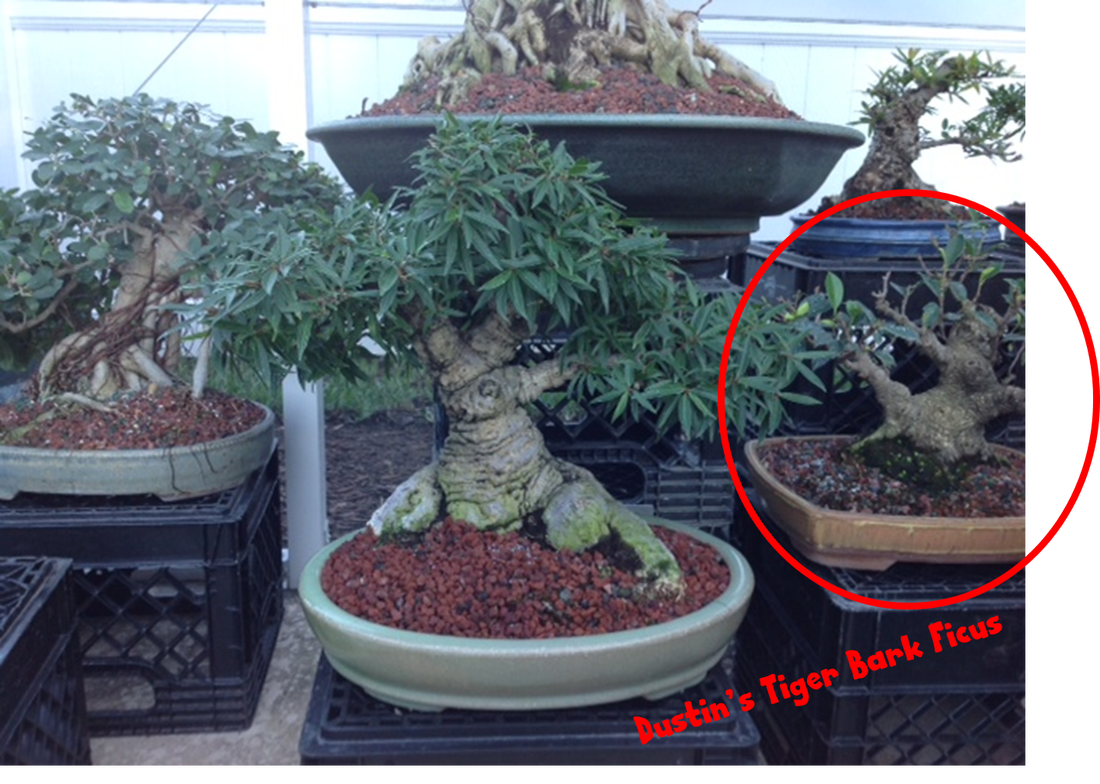 I unfortunately did not get a before picture... I had Dustin send me a picture of his tree and this is what he could find. When I worked on his tree, it was a lot more flushed out and had a ton of growth on it. Snip! Clip! I trimmed and wired the tree. It was a ton of fun to work on this tree! Thank you Dustin for letting me help you work on this tree! Below is the result: 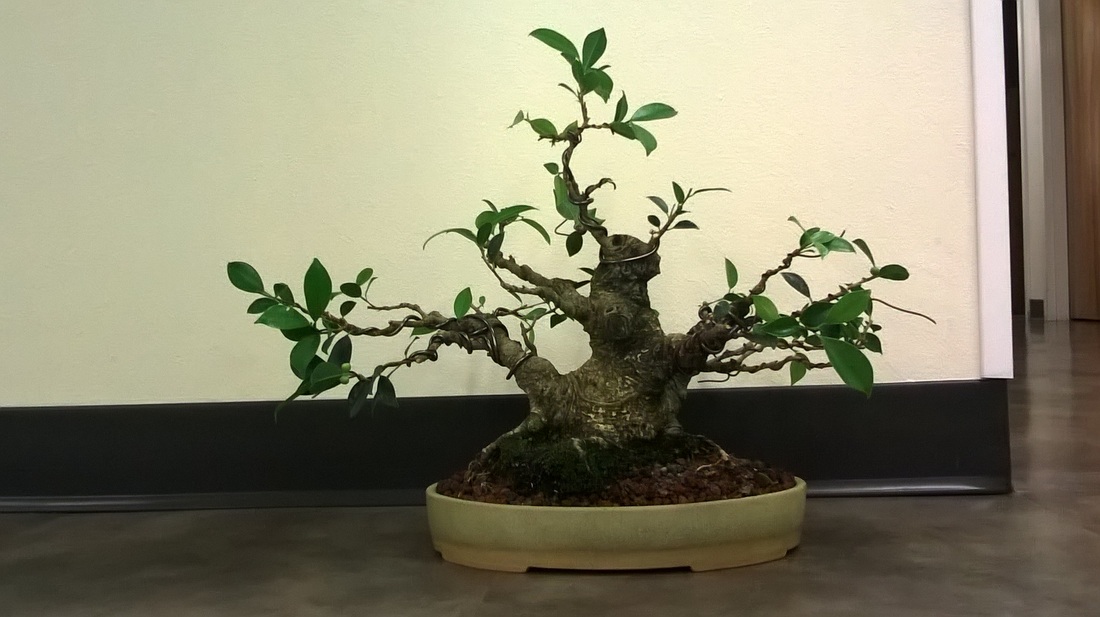 And here is the top of the tree: 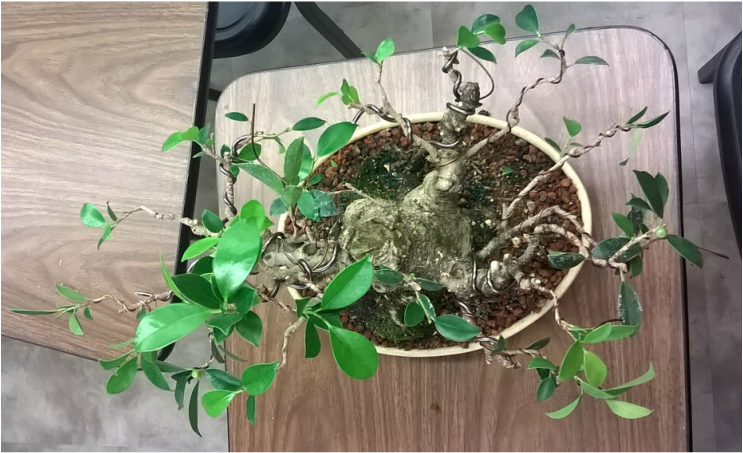 The tree has a good pin wheel look to it from the top! If you would like to learn more about the Tiger Bark Ficus and just ficus in general, click here. I hope you have enjoyed and learned about the Tiger Bark Ficus! (by clicking the link) Ben Jamin 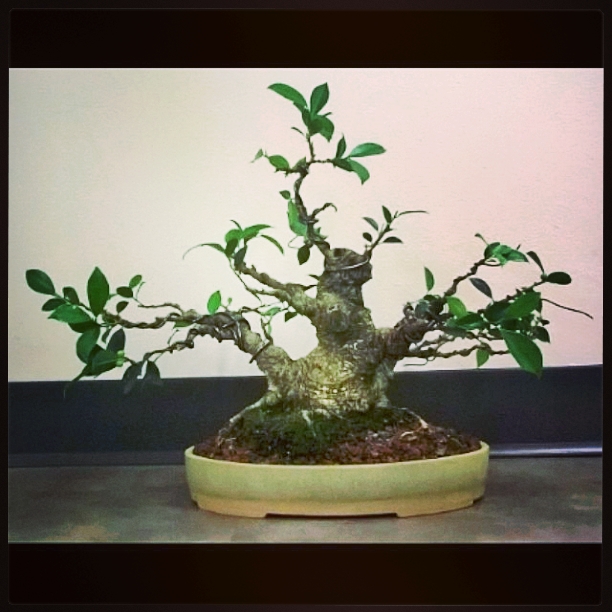 Hello Everyone, I wanted to share some beautiful Powderpuff flowers on the blog... Let me set the scene: I am coming home from being out all day and I have been expecting some flowers on my Powderpuff tree. I go over to check and see if it is dry (Which is was) and see a ton of flowers on the tree. I captured a picture of one very beautiful flower on the tree and did some magic to it. I think it looks really good! Below is the original photo (NO EDITING), color pop, and black and white. Here is the original (With No Editing): 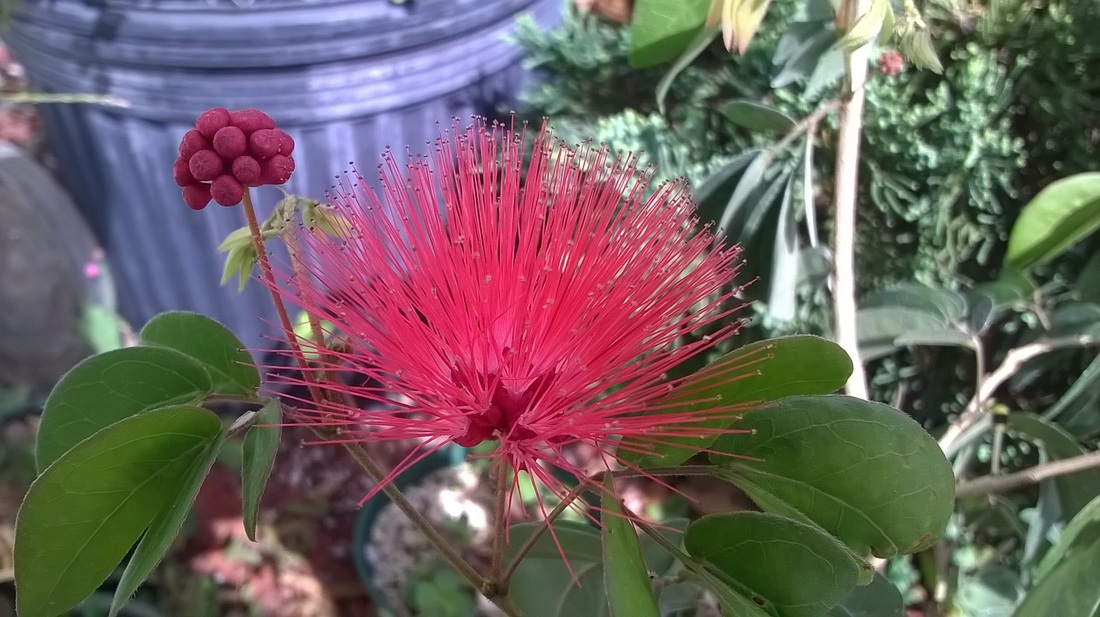 Here is the Color Pop: 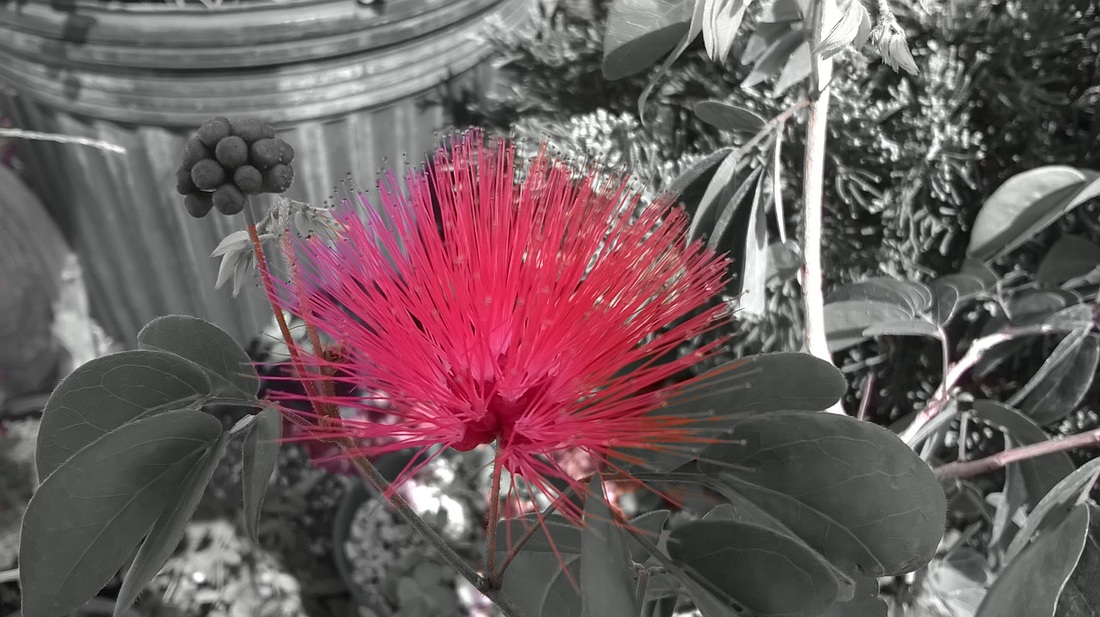 And Here is the Black and White (Which uses an effect called Ansel): 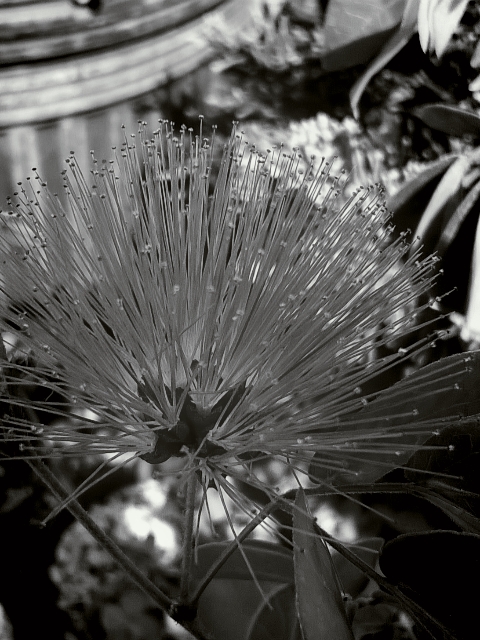 I really hope you enjoyed looking at the photos.
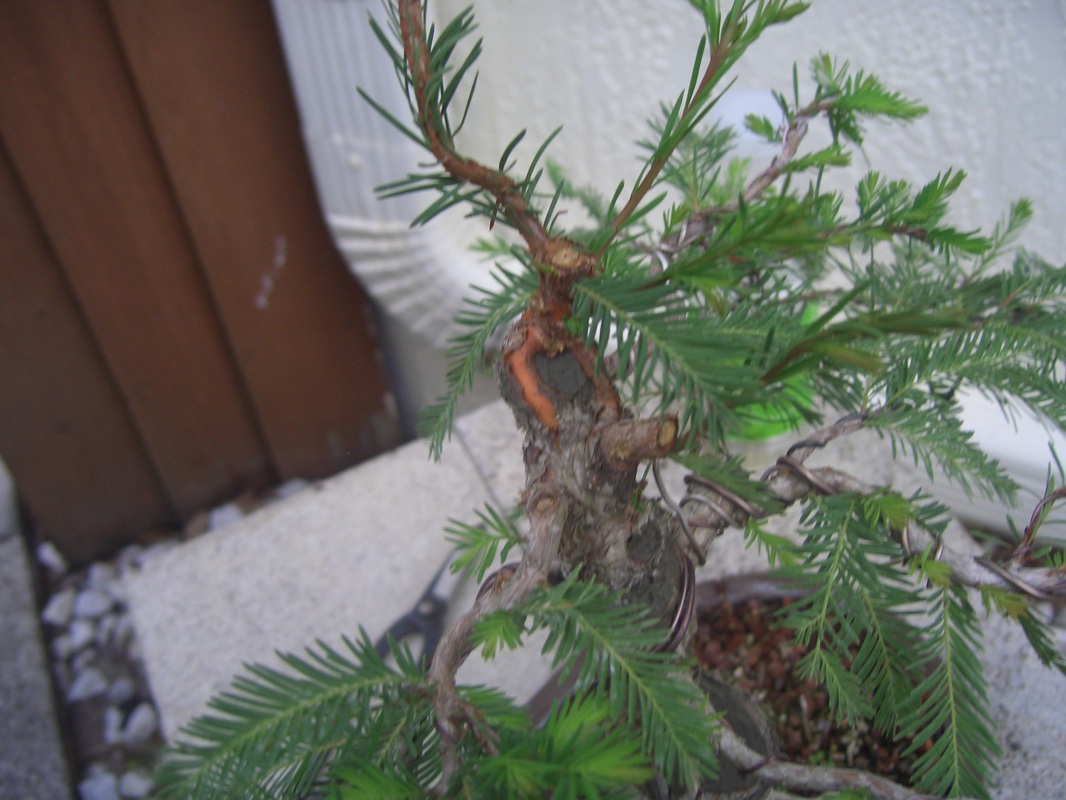
I took all of these photos and I'm very proud of them. Keep looking back because I have a couple of posts planned that you (the readers) will enjoy! Ben Jamin Hello Everyone, Happy August! I was out in the garden yesterday and saw an interesting orange-reddish color on the apex of a Mexican Cypress... The apex was cut a couple of weeks ago and it is now healing. Enjoy the pictures, Ben Jamin See the orange-reddish color on the apex. To find out more on Mexican Cypress, click here.
Hello All! Happy June! Since it's been a rainy June, I haven't had a chance to go outside and work on my trees... But last night, I went to my usual CFBC meeting and I got to work on some trees. One of them was my blog tree... The ficus microcarpa! This tree was given to me by a bonsai friend. When I showed it to him, he remembered the tree right away! You have seen this tree in the blog posts A FICUS MICROCARPA... and A FICUS MICROCARPA UPDATE... I decided to do some work on it and start to get it into shape... Here is the before picture: 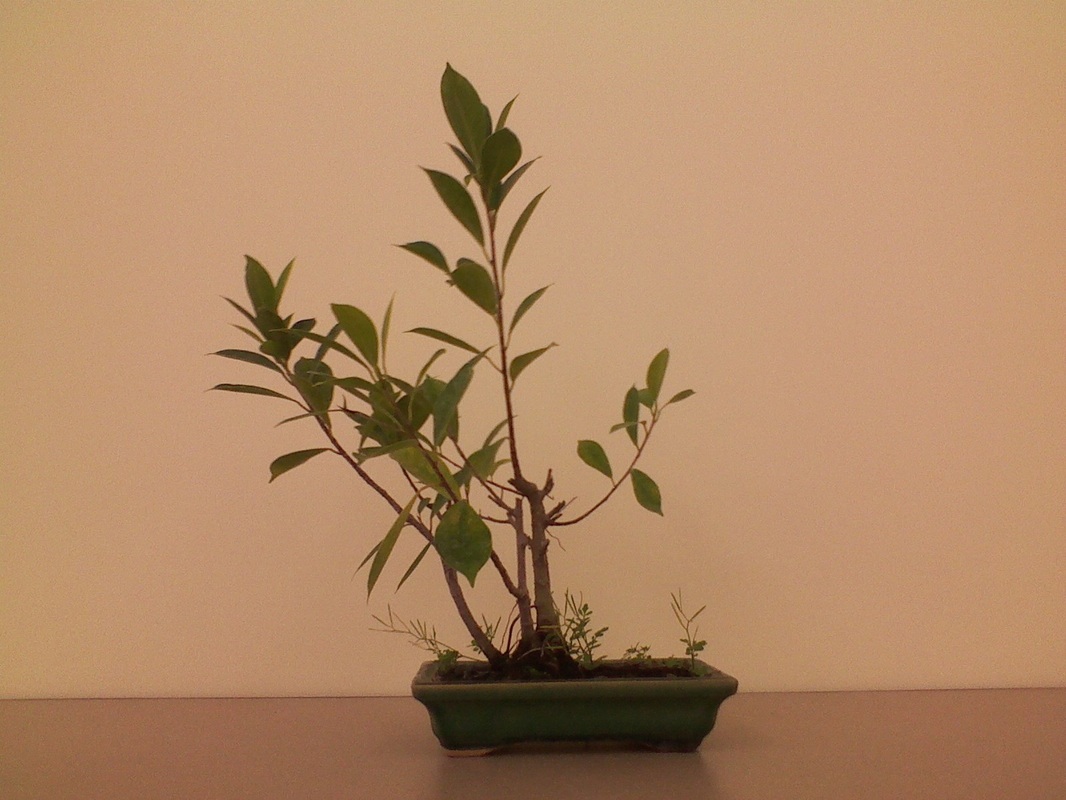 I decided first it was time to defoliate because I am trying to get smaller leaves. 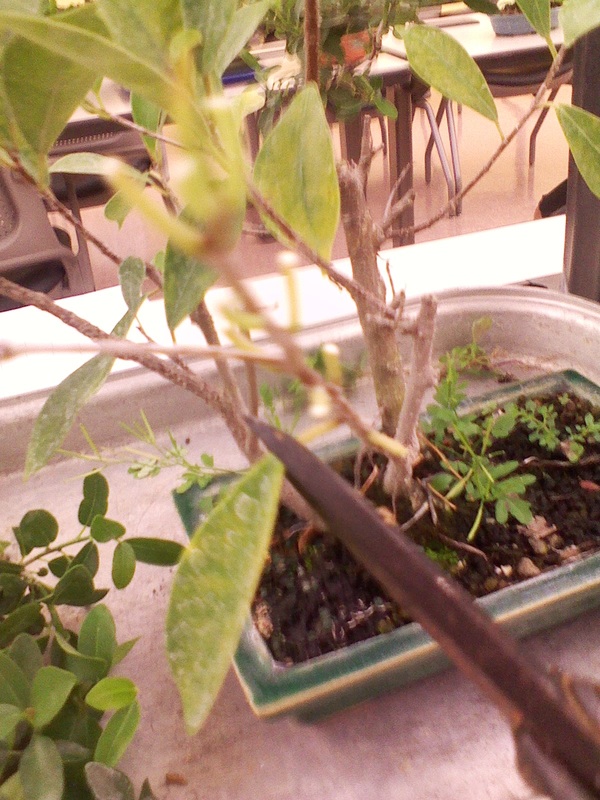 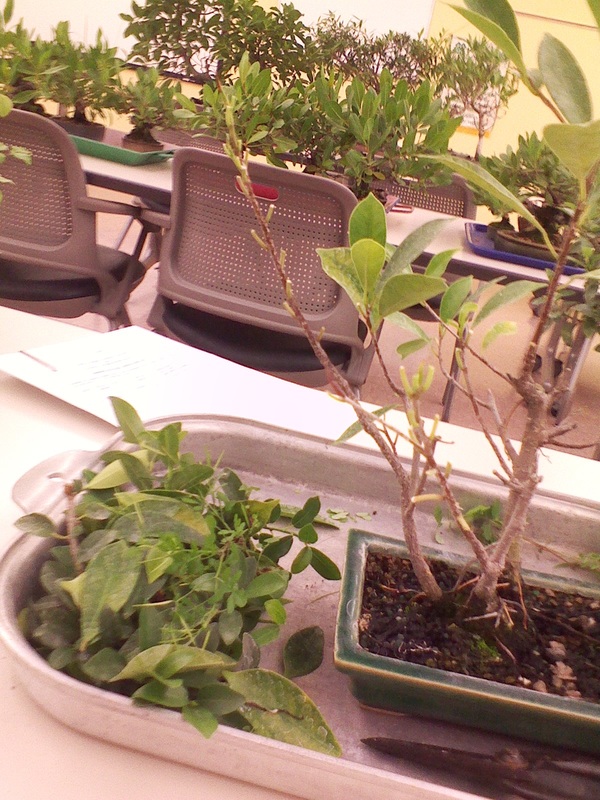 I finished defoliating the tree! Now it's time to cut these branches in so I can force back the growth. 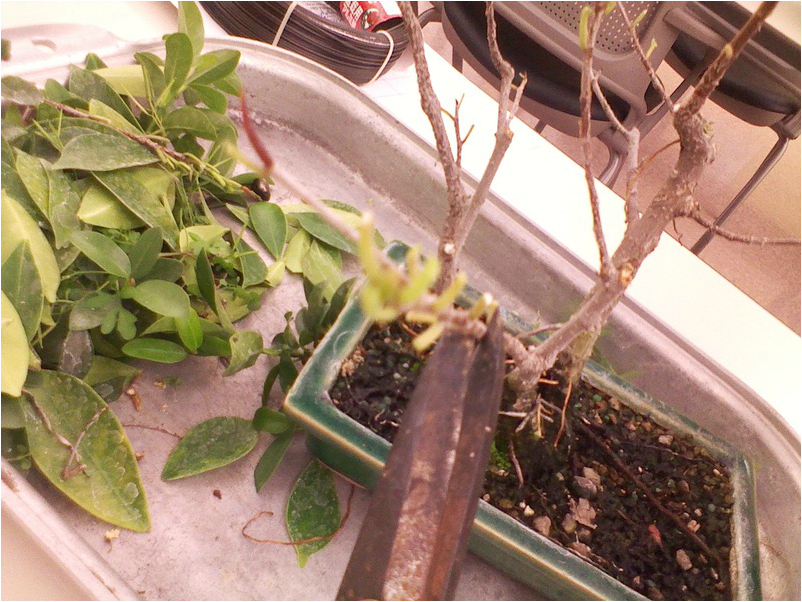 I finished cutting back the branches! 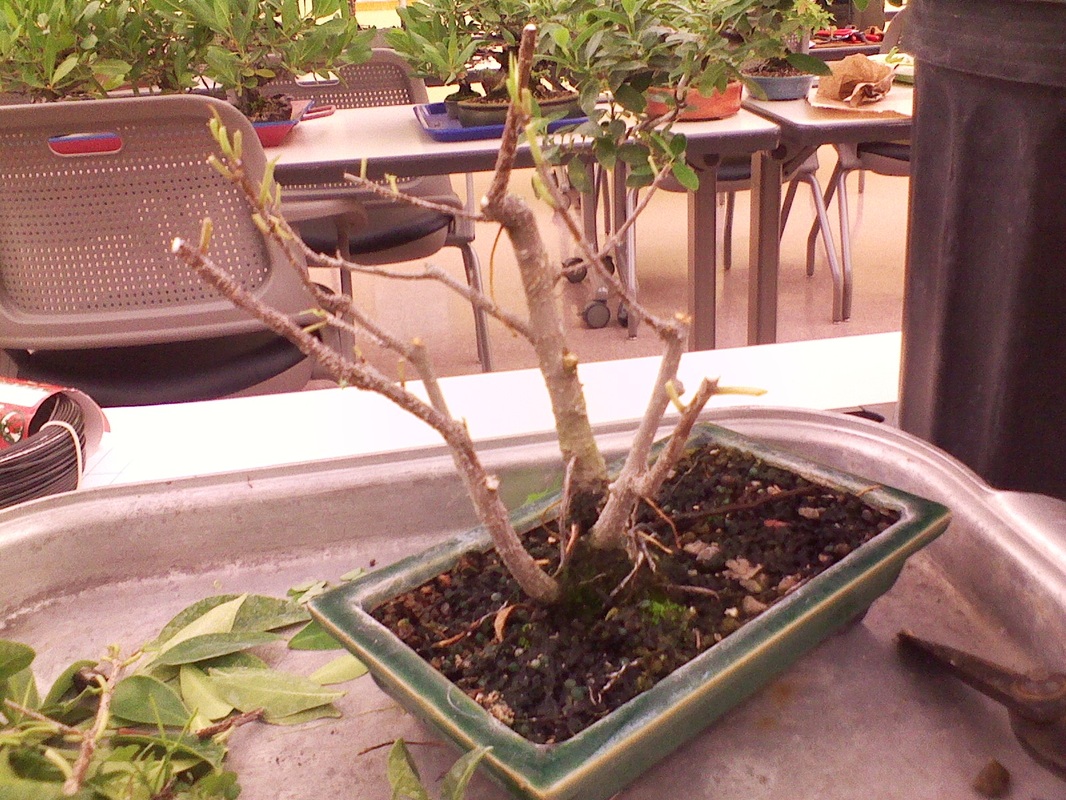 Now I have to add some wire... 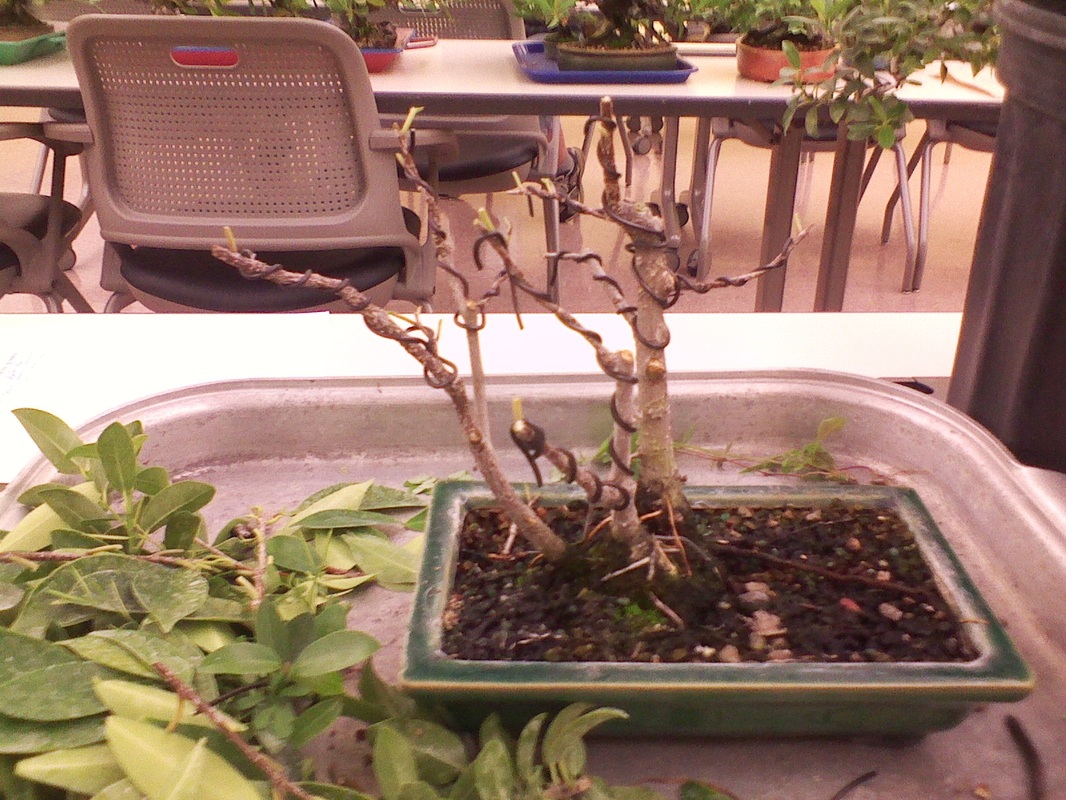 Now that I wired out the whole tree... I have to place the branches to where I want them. Before I show you the finished tree, the before:  The top of the finished tree: 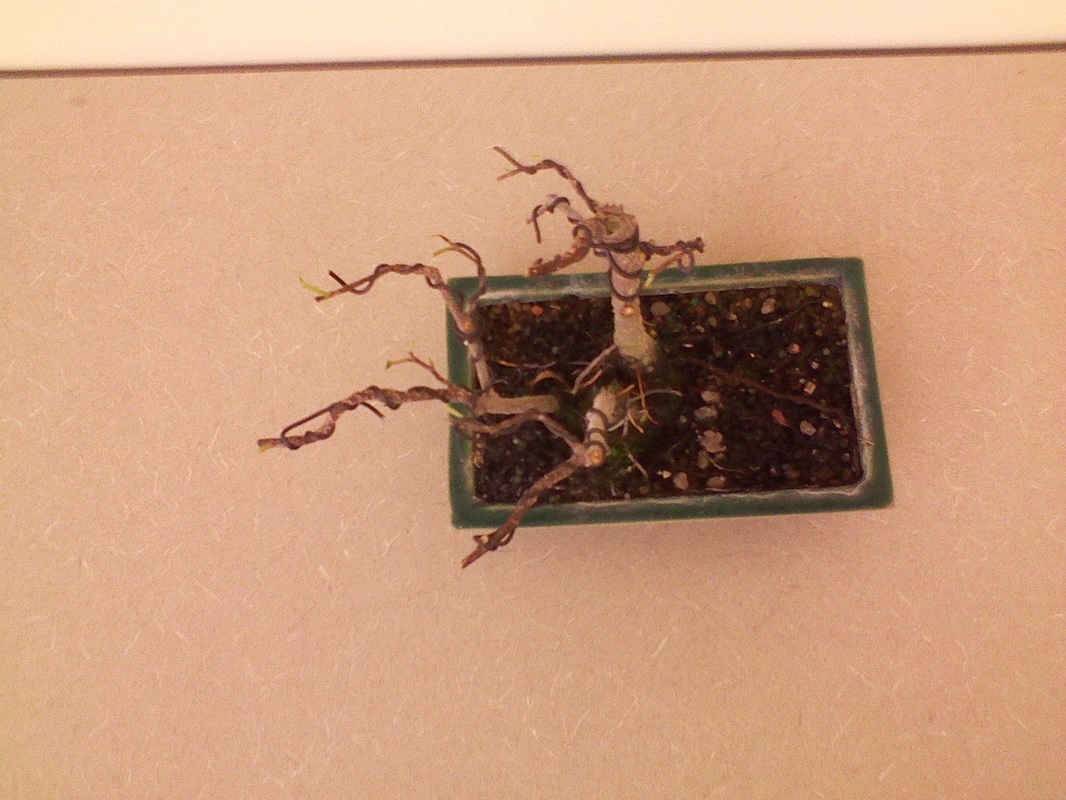 And the finished tree: 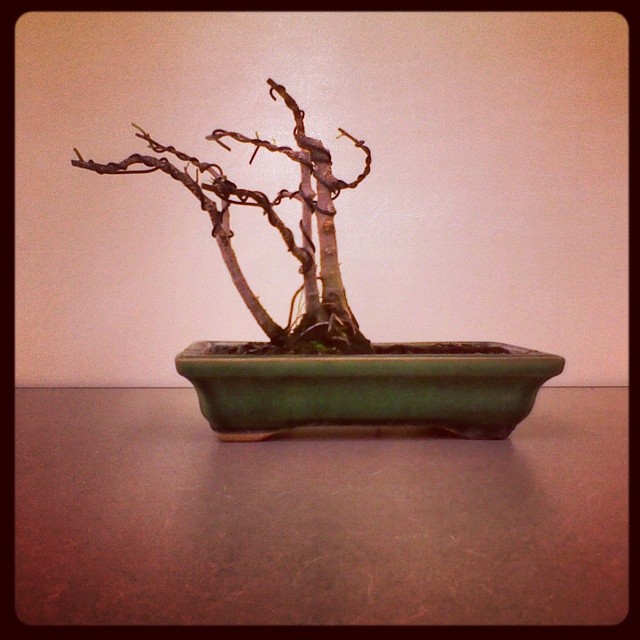 I hope you have enjoyed and learned! The next step is to let it grow out a little, and repeat the steps from this blog post. This tree is also very root bound (roots circling the pot), which means I need to repot it. But that's another blog post...
~Ben Jamin Hello Everyone! Recently, my neighbor got a new fence... But a big bougainvillea was in the way! So my Bonsai friend Adam (Facebook Account) (Blog) came to dig the big tree up! But when I say big, I mean BIG!! This tree has been growing in the ground for 19 years! When Adam was taking the bougainvillea out, I got a little piece that came off... Below is what it looks like: 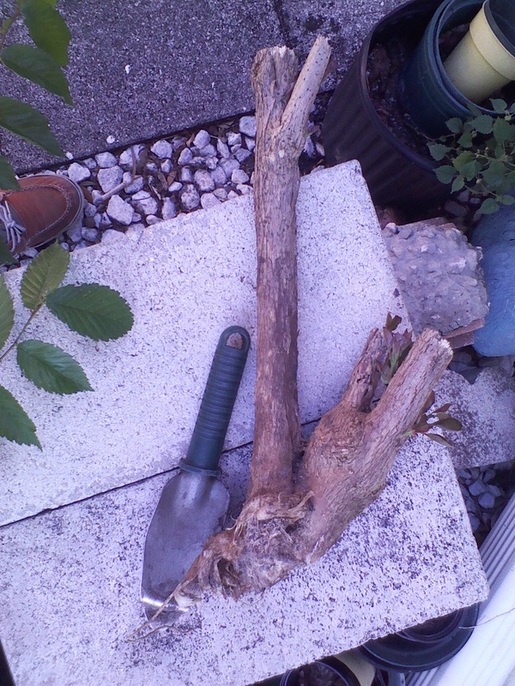 And here is the piece Adam got: (If you want to know Adam's Side of the Story, Click Here) In case you want to know more about a bougainvillea, you can click here. This particular bougainvillea has a pinkish purple flower. Although this tree has a pretty flower, it has a lot of thorns! Like I said above, this bougainvillea has been growing in the ground for 19 years! This tree also loves to grow wild! Below is this bougainvillea flowering: 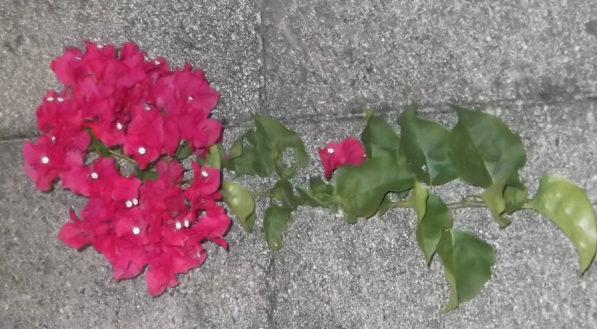 Back to my little piece, after getting it... I had to get this bougainvillea in water, it only had 1 root! It was hard finding a big enough container to fit this... Finally, I remembered I had a watering can a good size for this bougainvillea. Below is how I left it for the day... 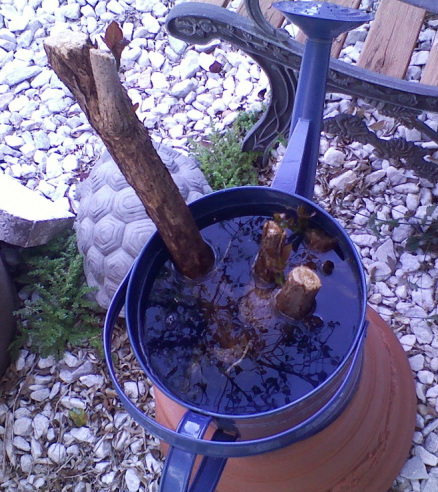 I will keep you updated on how this tree is doing!!
Enjoy, Ben Jamin Comment / Mobile! Hello All, Happy April!! I found out today there is word called Plantlet! Below is the definition... It's a baby plant!
Hope You Learned, ~Ben Jamin Mobile / Comment! Hello Everyone, (Juniper Info) (Re-potting a Juniper Info: 1, 2, 3) On Valentines day, I brought one of my junipers to Jason Schley (Bio) for placement of some branches. CFBC was putting on a Bring Your Own Tree Workshop (BYOT) for Junipers. Here is what the juniper looked like before branch placement:  Here is Jason working on my tree:  And here is what it looks like when it was done having the branches placed: 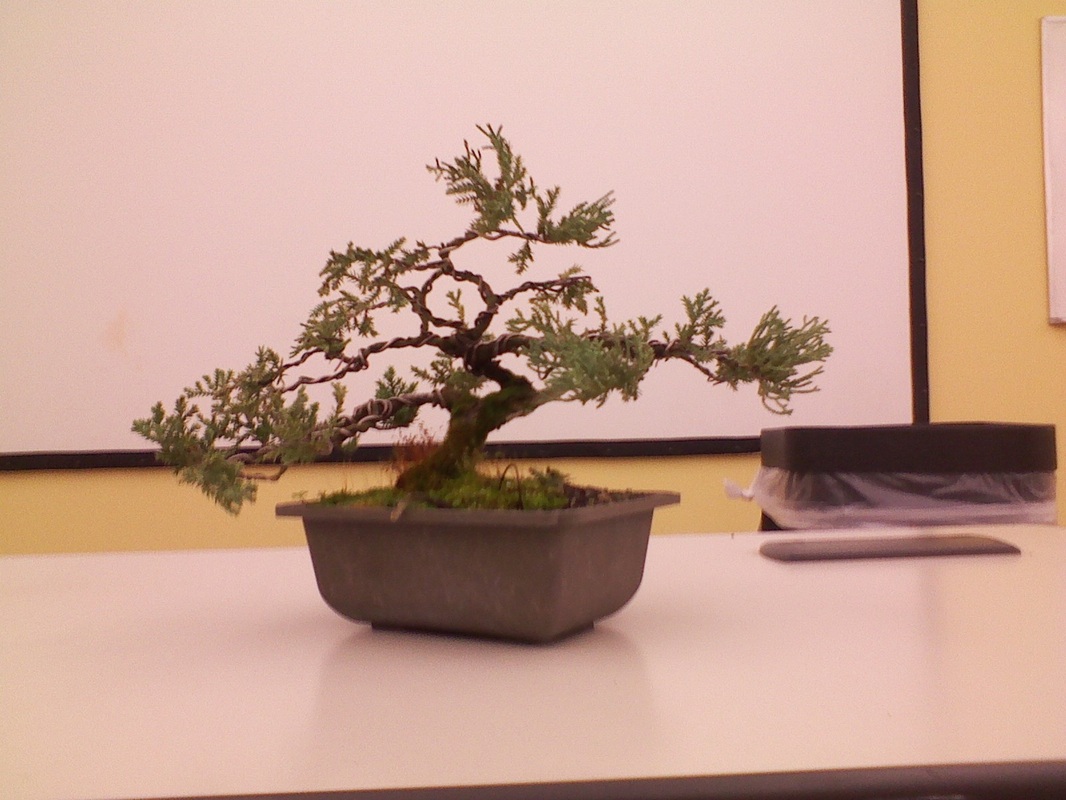 When Jason finished placing the branches, he told me to put it in a nice unglazed, oval pot and to get the moss off the trunk. He also told me not to reduce the length of the branches because it would stress out the tree. So in about a week after placing the branches, I picked out a pot and put it in there.  Here is the pot I will put the juniper in. In order to put the juniper in the pot above, I had to go through a couple steps. Here are the steps:  I had to get the moss off the trunk. If I kept it on, it would eventually rot the trunk away. 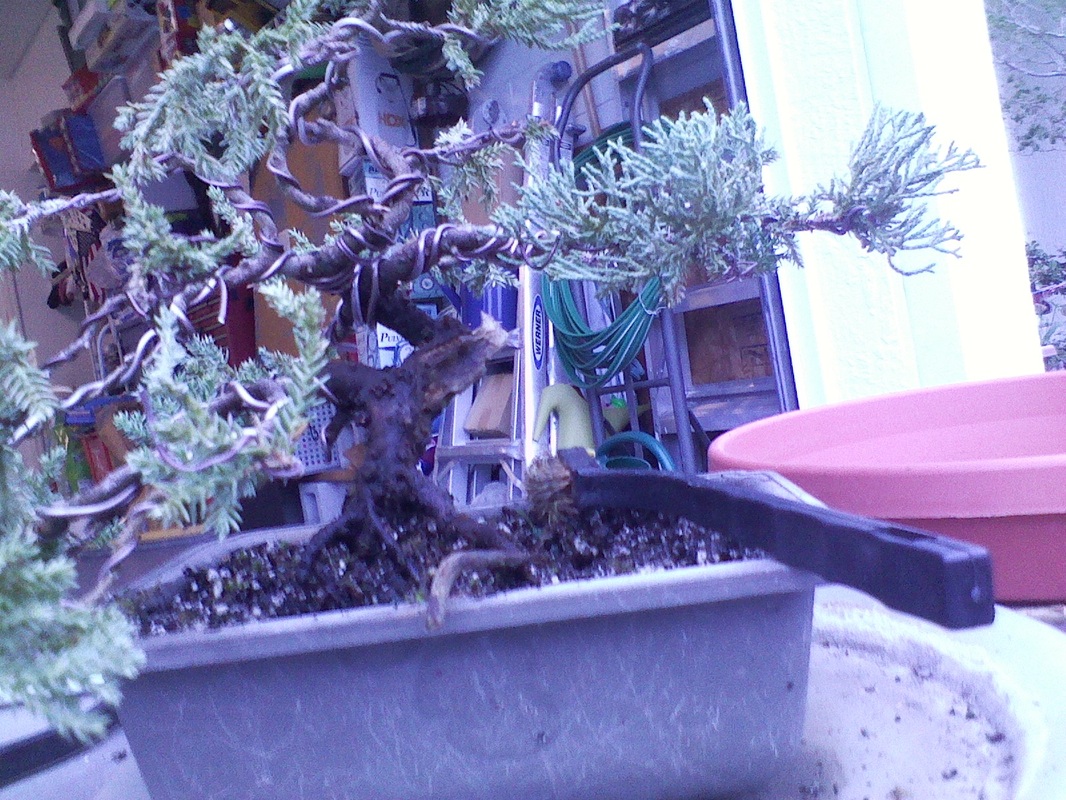 All off! Now I have to take it out of it's pot. One of the reasons I have to repot the tree is because it isn't stable in it's pot. It has fallen out of it pot before, squirrels have dug in the pot, and the tree's roots weren't supporting it. The soil was also broken down muck. 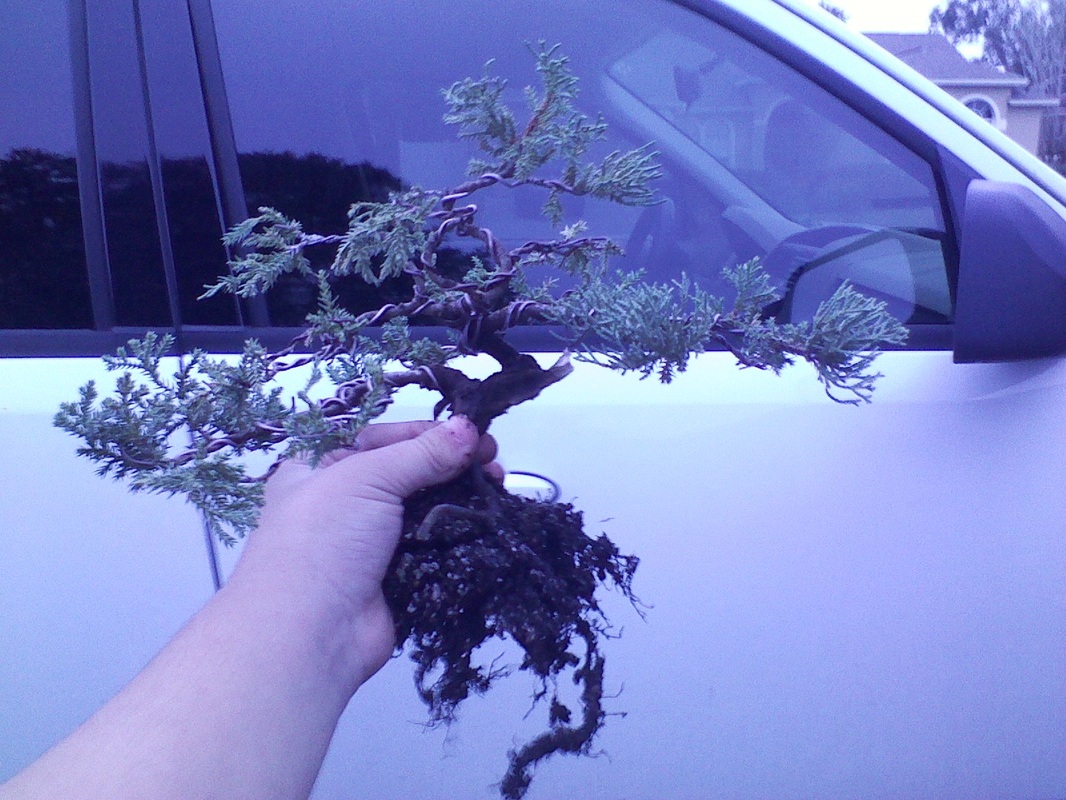 The juniper just got taken out of the pot, no wonder why the roots couldn't support the tree! There really wasn't any!! Now I have to prepare the pot. I have to put in two screens to hold in the soil, two small pieces of wire to hold in the screens, and two big pieces of wire to hold the tree in the pot. 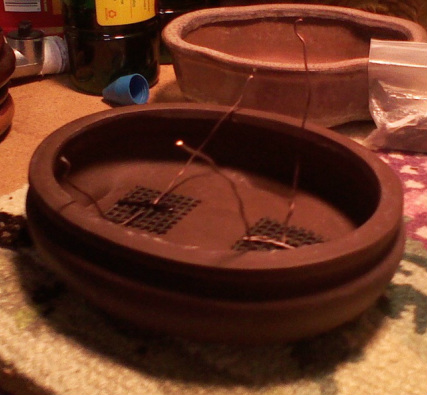 All prepared! Now for some soil and chop-sticking! Chop-sticking helps get rid of the extra air space. 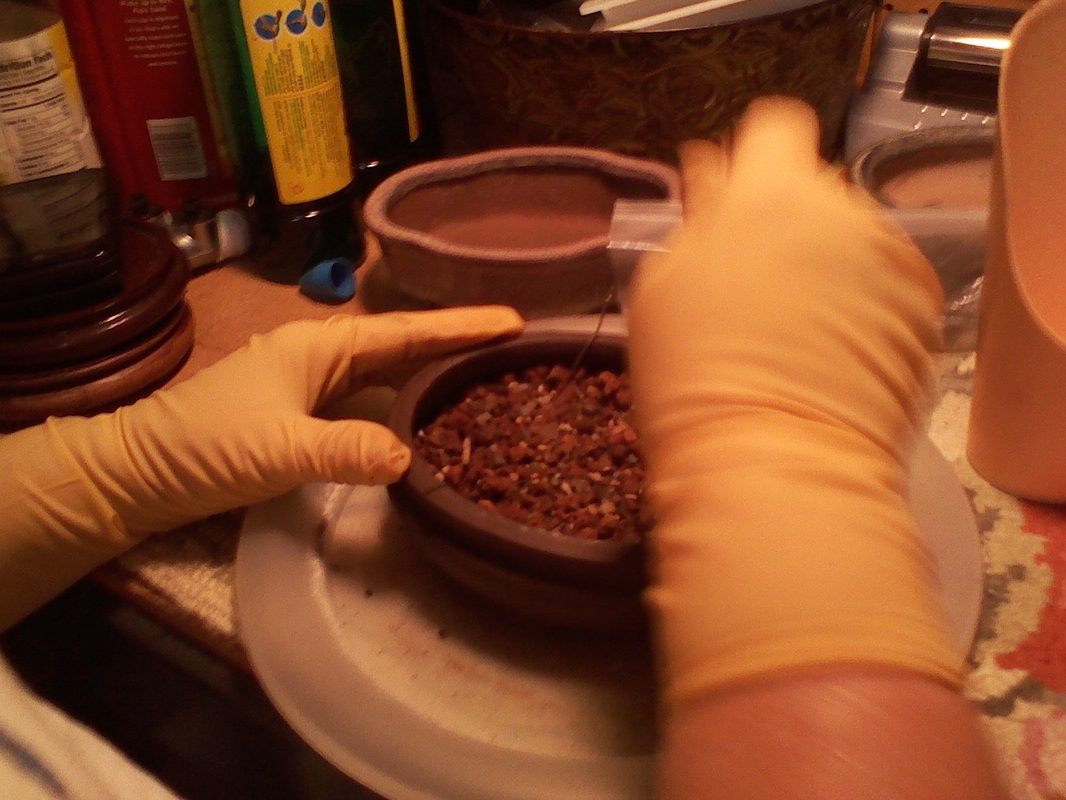 The bottom half of the soil is all chop-sticked! Now to fit the tree in the pot. 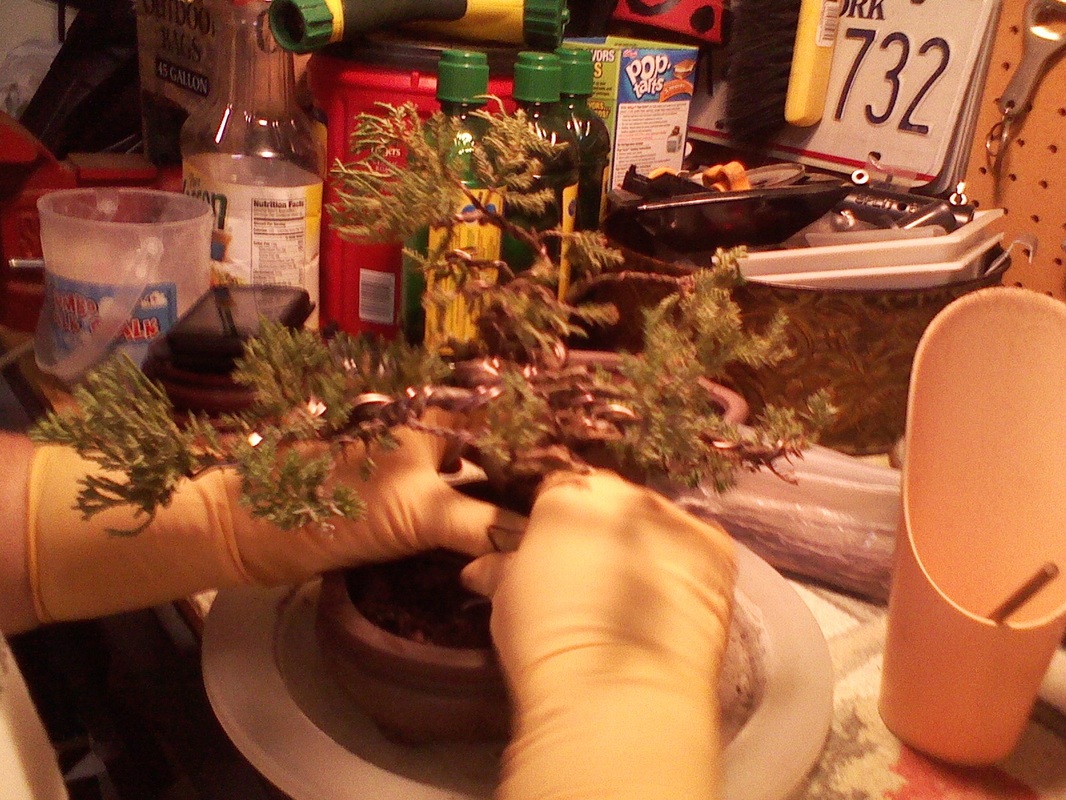 The tree fits and it's placed in the pot. Now to fill it with soil, and finish chop-sticking. Here is the before picture so you don't have to scroll to the top of this post: 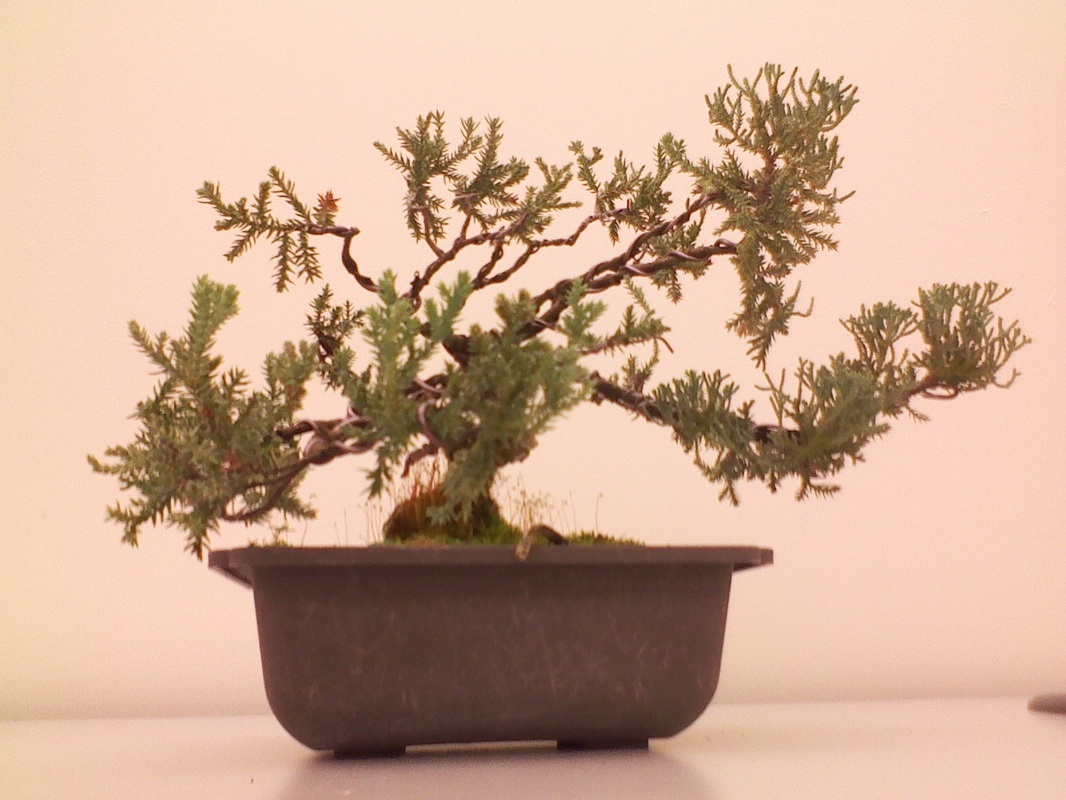 And here is the after: (Instagram filter on it) 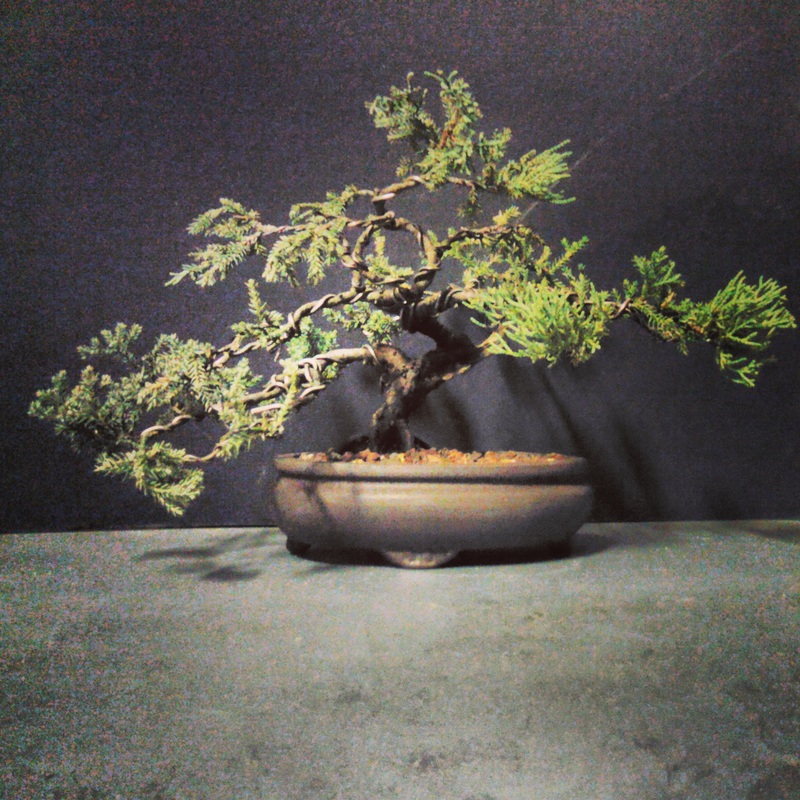 I hope you have learned about repotting a tree and about junipers. Thank you to all who helped!
~Ben Jamin (Comment! this post is mobile) |
Ben jamin LorberI LOVE Bonsai!! I have participated in many styling competitions and have even won! I have also displayed many trees in many exhibits! Archive
June 2017
My Bonsai FlickrCategories
All
If you aren't getting email updates from the blog... Contact me by either commenting or going to the contact page...

|
 RSS Feed
