|
On World Bonsai Day Weekend (May 13-15), I was at my friend Randy Clarks house. We went to a World Bonsai Day celebration at a local nursery and the day after he let me work on some trees. I told Randy that later in may at the Bonsai Convention I am attending, I am doing a styling competition. The species I was going to style is a Procumbens nana Juniper. Since I don't have any juniper I can practice on at home, I asked if I could work on one of his. He picked this one out: 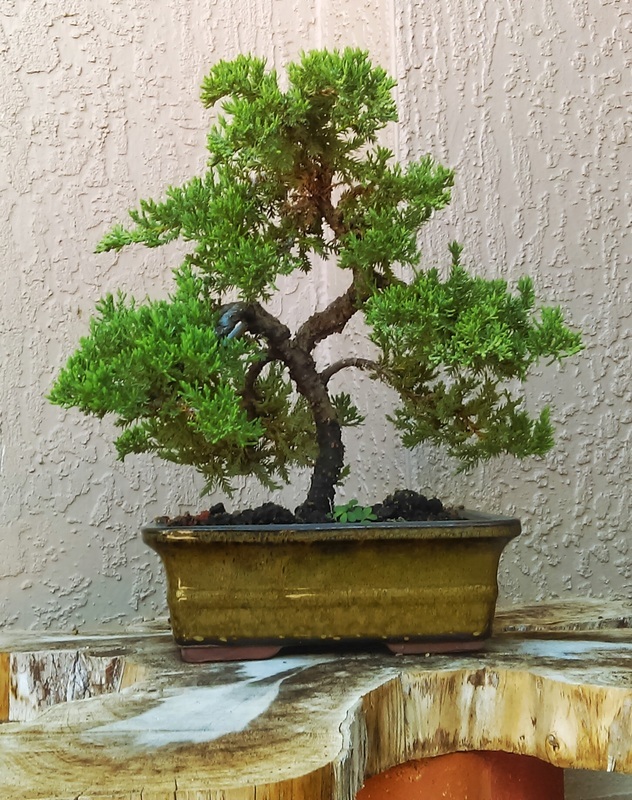 Randy said trim the juniper. So we brought it inside to his studio and I started to trim. 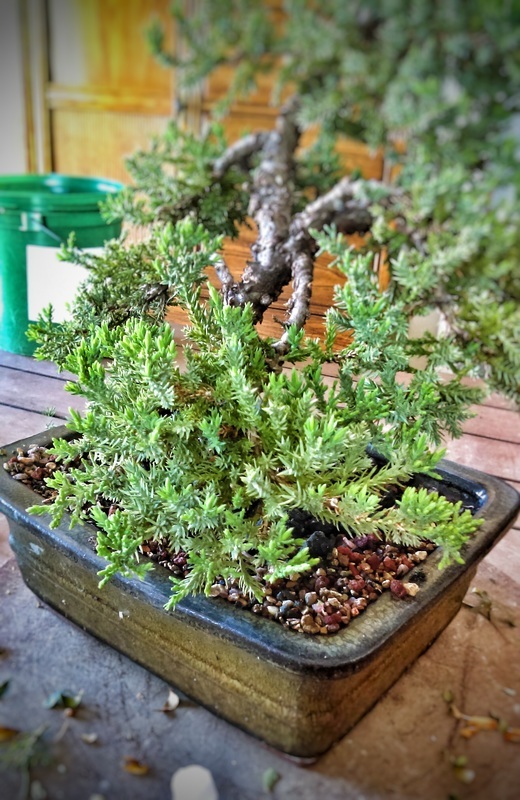 He said start at this pad. He showed me how to trim a juniper since I wasn't 100% sure. He said cut between the little needles shown below. Notice I did not say pinch. Always cut the junipers 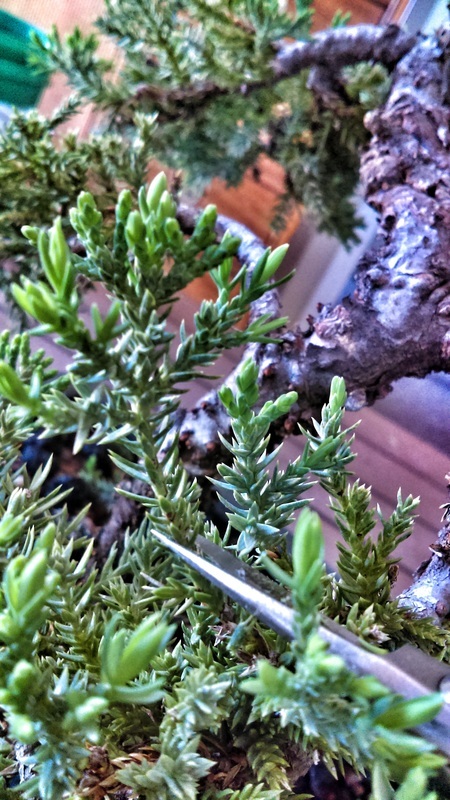 So I trimmed the pad this way also cutting off everything growing straight down. This is how the pad turned out: 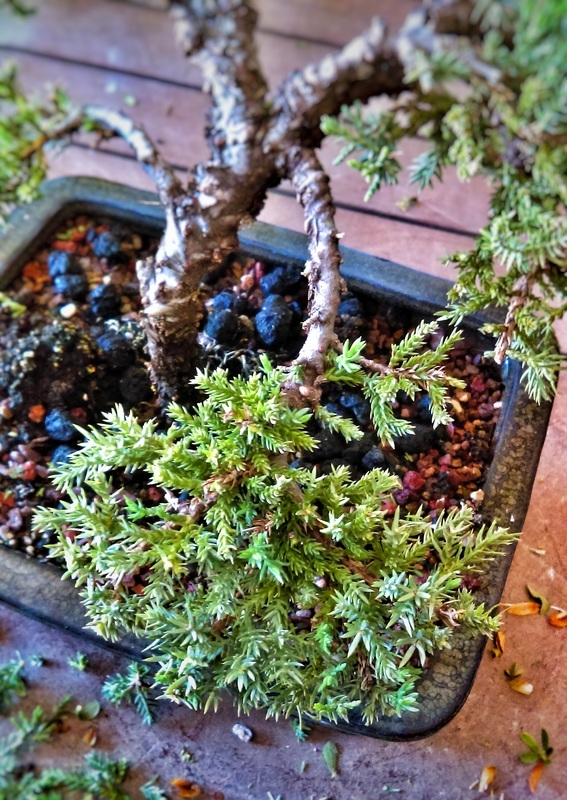 So I trimmed the rest of the tree defining each pad and here is the after: 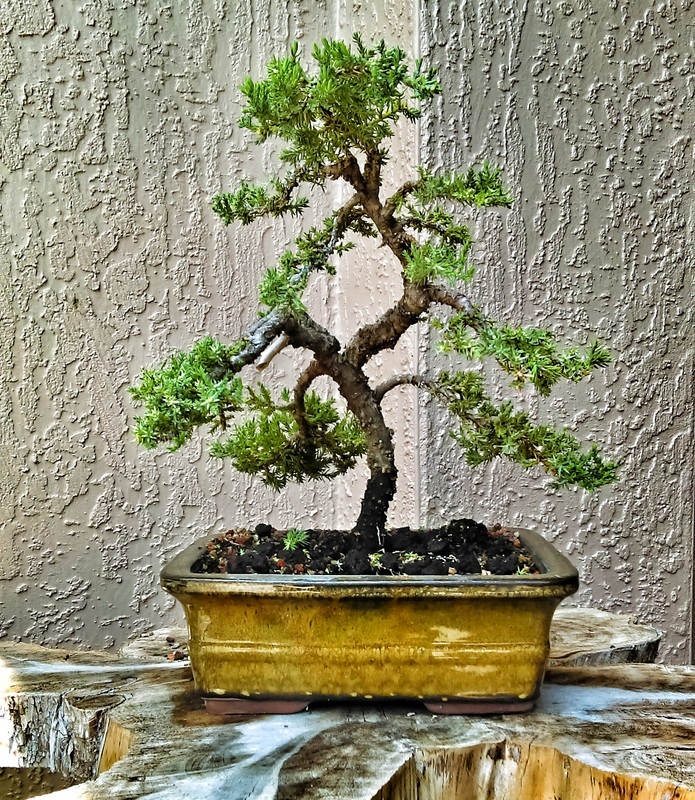 Working on this tree did prepare me for the styling competition later in May. Here is what was given to me to style for the competition: 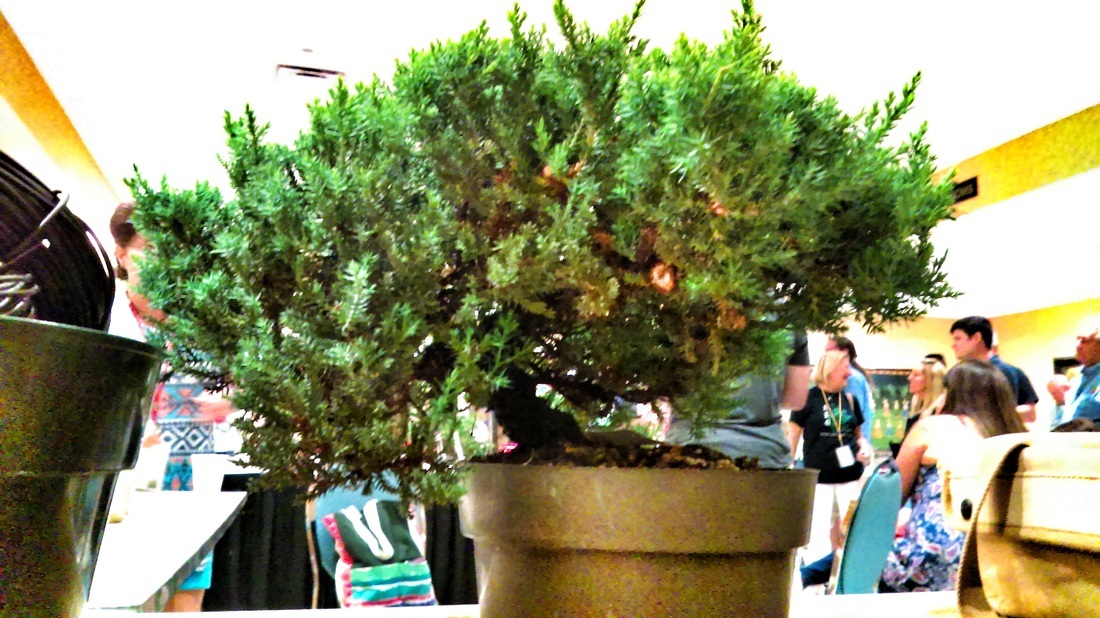 It is always hard figuring out which branches to use when the tree is super full and never been styled before but I think I picked the right branches and padded the tree out nicely. Here is the after:  I feel like I did a really good job on the tree. I even used a friends dremel and took a shot at carving for the first time. Here is a close up of both dead wood features: 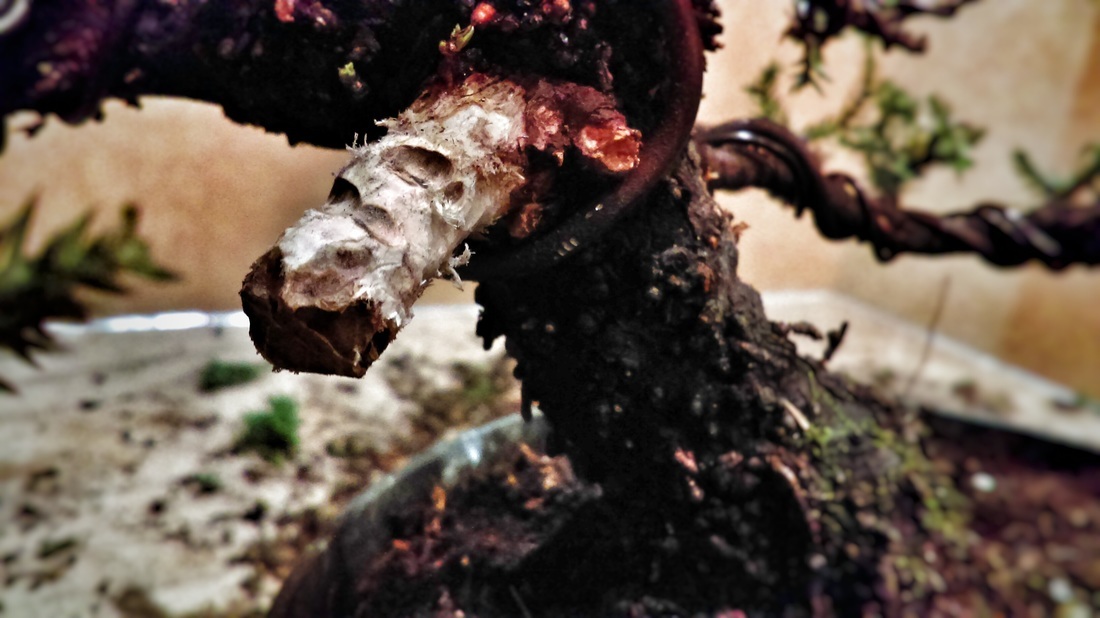 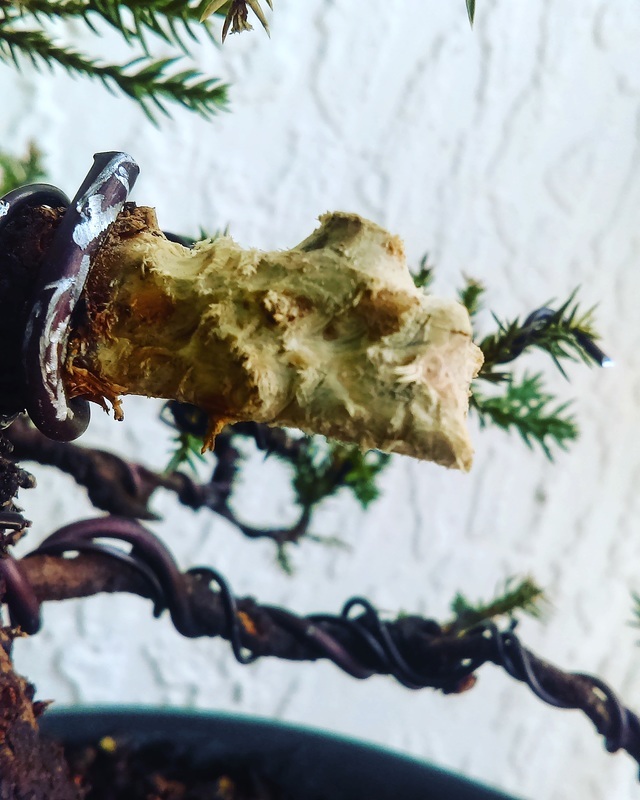 I asked Bjorn Bjorholm to critique the tree and he said I did a very good job. He said I should have left a little more foliage on the tree but otherwise I did very good! Bjorn said my wiring skills are at a B- level, which to me is a big complement! In case you dont know who Bjorn is, here is Bjorn working on a hackberry.  Here is the afters of both Procumbens nana Junipers I worked on in the month of May:  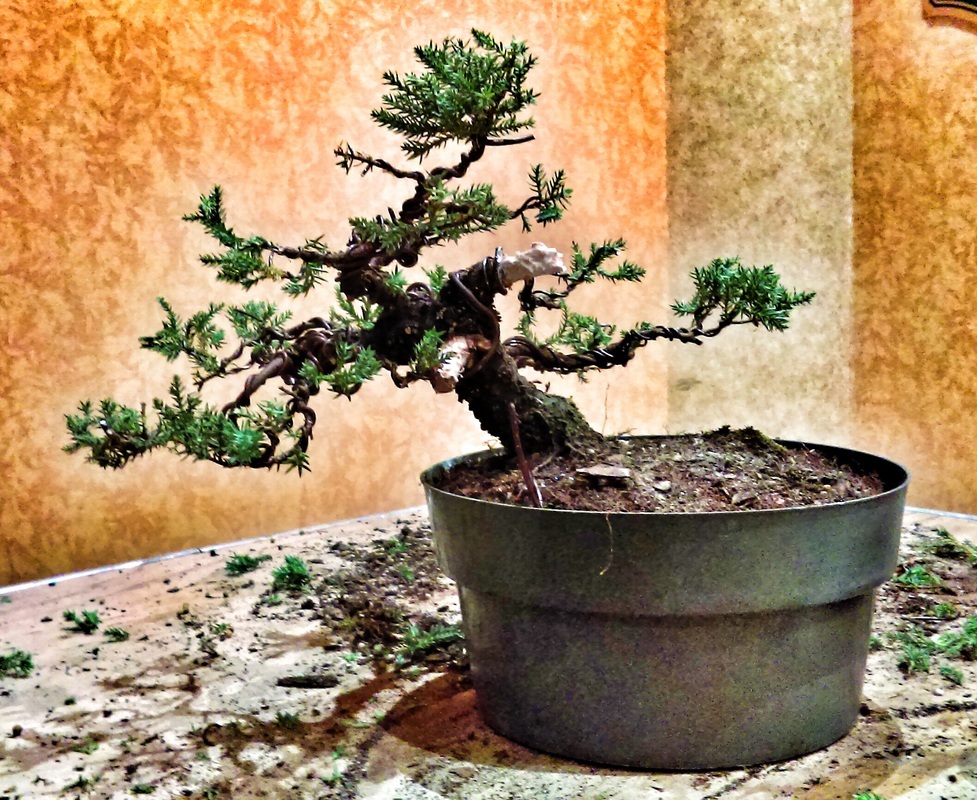 See you next time!
0 Comments
After reading the title, you are wondering a pine!? I've never done a post on a pine. This pine is from one of my great bonsai friends Mike Rogers. We were going through his nursery and I found this little guy.  I had the idea to put a piece of wire on it and put some movement into it. I asked Mike to help me since I did not want to break the tree in half 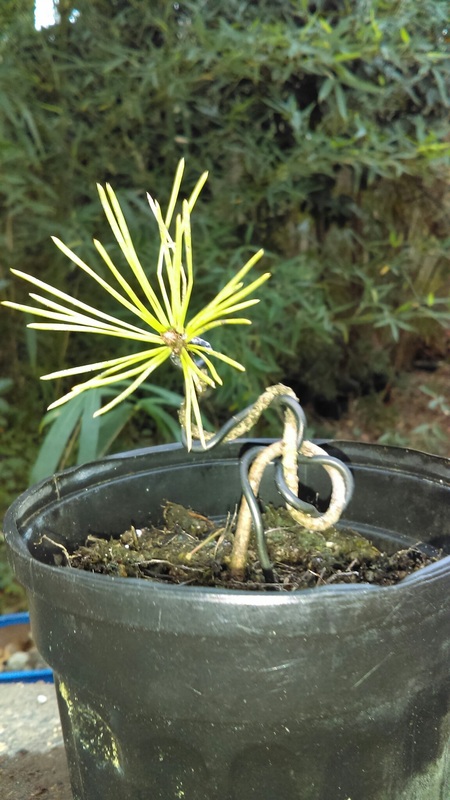 So when I did this, it was February 16. I took the pine home and it has been living on my bench for a few weeks. After taking it home, I wanted to find out why it was called a Mikawa Black Pine and not just a regular Black Pine. I found out that Mikawa is a place in Japan where these pines are found. I found this out from Peter Tea's website. This particular Pine was grown from a seed. So on February 28, I repotted the Pine into a colander. The reason you repot into a colander is on this website. So now it's time to take the tree out of the pot. 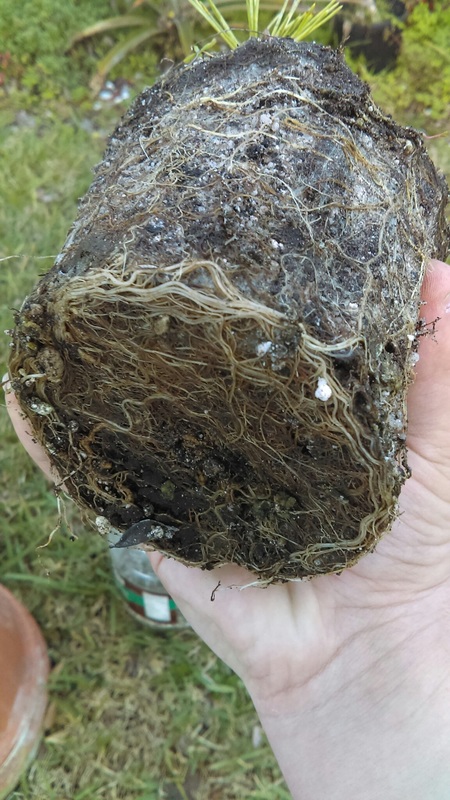 Wow! Look at those roots!! I did not expect that many roots!! Now if you notice the white stuff, many may think it is a bad thing to have in the soil. But it is actually very good for the tree. Some plants rely on this stuff for survival. The white stuff is called Mycorrhiza which is very good for the roots and the tree! Mycorrhiza is a symbiotic relationship between the roots of a plant and a fungus. According to Wikipedia, at least 80% of the land plant species have mycorrhiza. Now it's time to rake the soil off the tree. I usually bare-root the tree with the hose but you should really try not to bare-root conifers. So for this tree, I will use my trusty root rake. 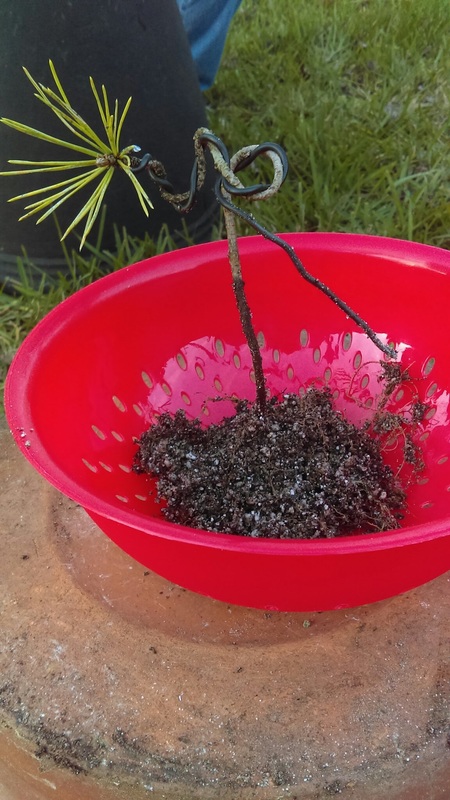 The soil came off a lot easier than I expected! After getting rid of the soil, it seems there is more trunk then originally thought. This will make it an even better tree! If you notice in the picture there is luckily some extra wire that was used for the original styling that can be used. Now, time to make this tree even more interesting! Before I show you the finished tree, here is the before picture. 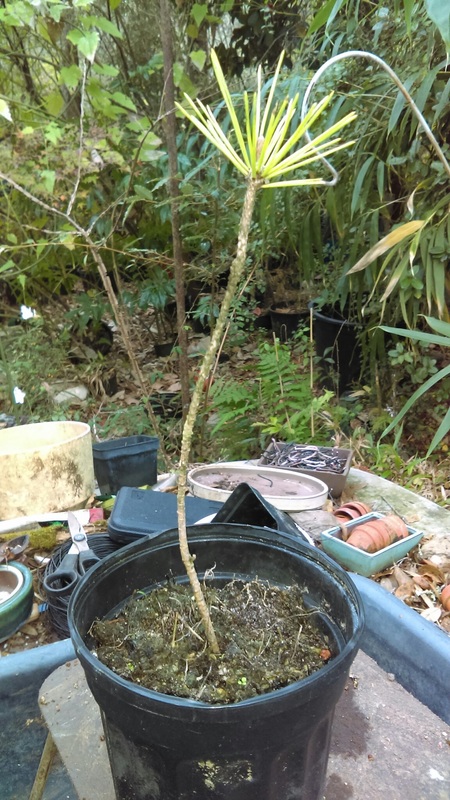 And the after 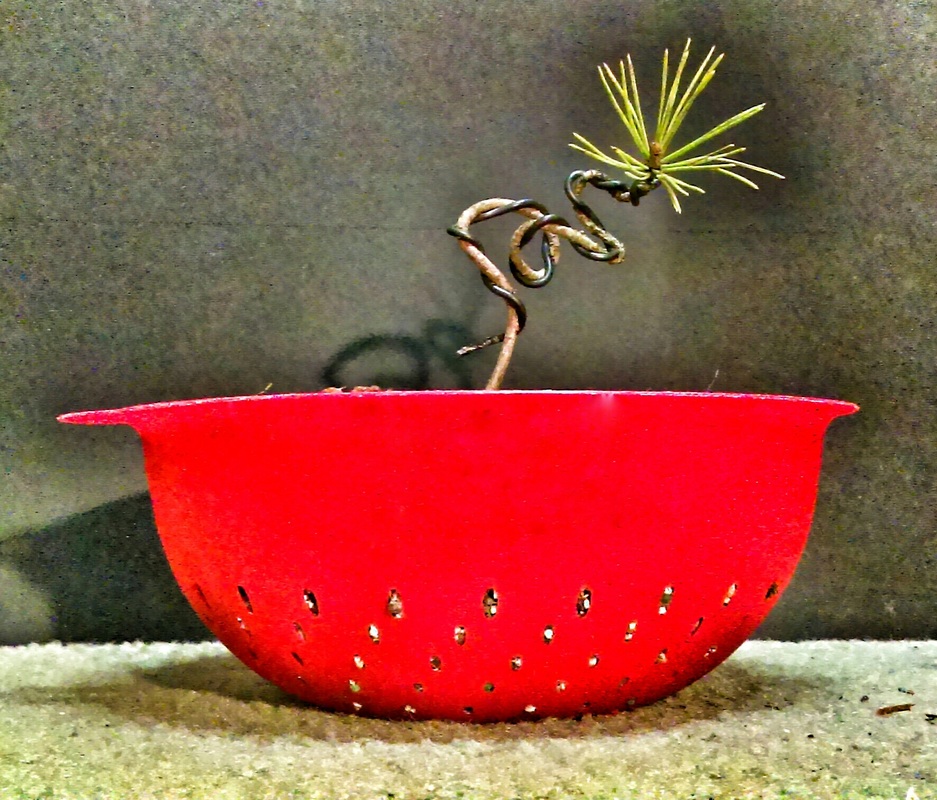 Wow, what a transformation!! I can not wait to see what this tree looks like in a few years!!
Hope you learned a lot about pines and will see you next time!! Recently, I was learning about forrest planting. Then apply what was learned to a forrest planting using cypress. Me and 2 other people created a 5 cypress forrest planting. We picked out a nice yellow looking pot for all of the cypress to go in. 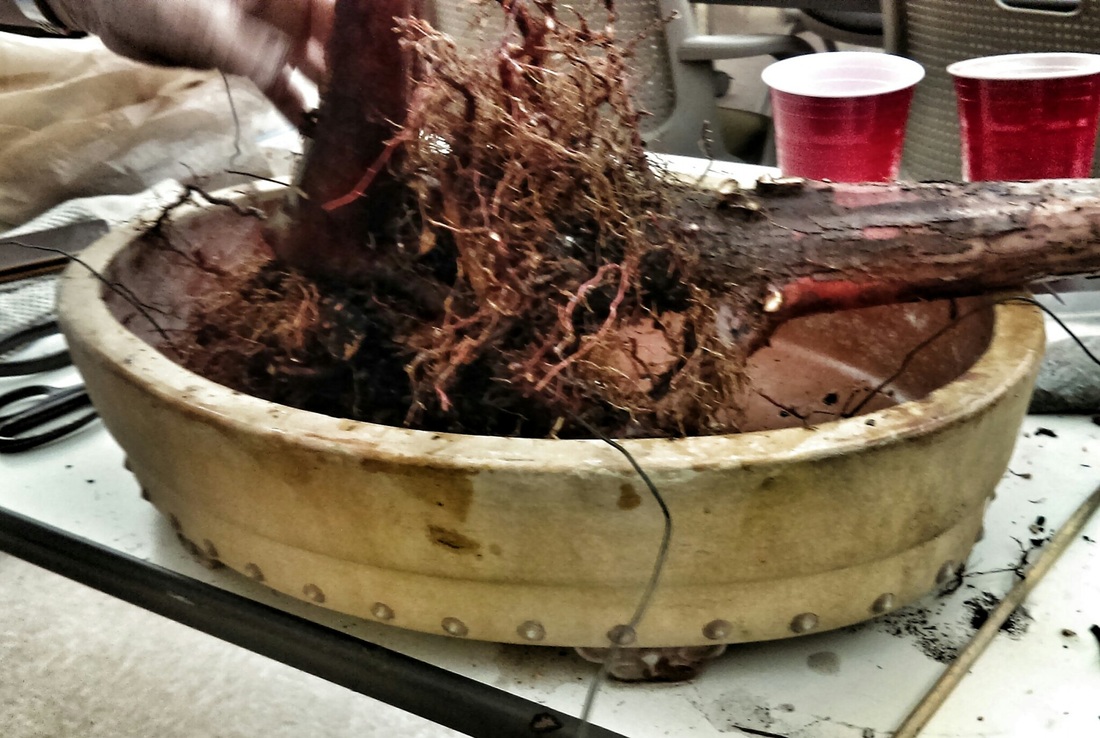 The first thing to do to the cypress is prepair them to be put in the pot. After being prepaired, then we had to figure out how we wanted the cypress arranged... When arranging a forrest planting, you do not want what they call a "picket fense", you want to make it interesting and most importantly... NATURAL 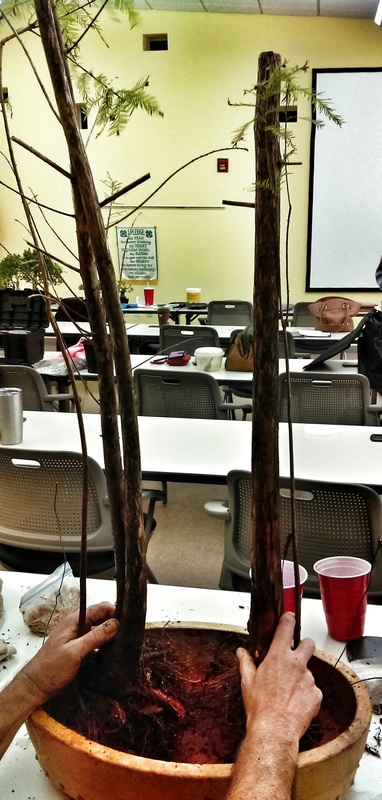 As you can see, we have the smaller lookng trunks torwards the front. The reason for this was to make it controversal. We wanted to get people talking! 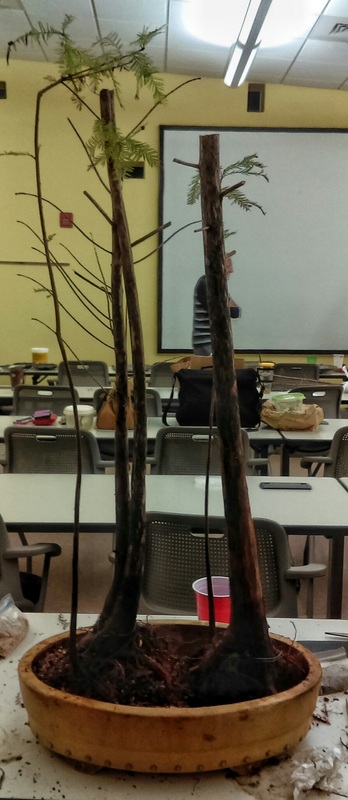 Now postitioned how we wanted it, it's time to chop the cypress to different hights. You do this to make it more interesting. If you go outside and look at a forrest, not every tree is the same size and thickness. That's why you use skinnier and thicker trees, and taller and shortet trees. 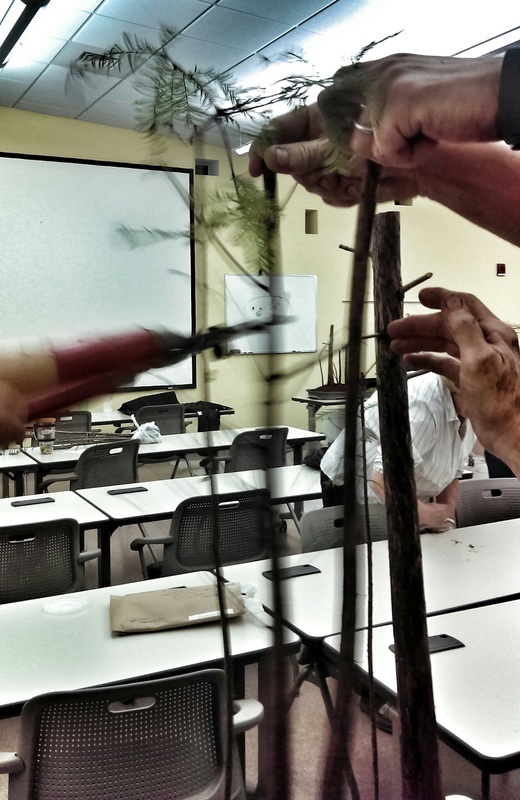 Off it goes! And that's it! I'm going to show you the after picture but first from the sides... When you do a forrest planting, you need to be able to see each part of each trees trunk. Take a look and see if you can spot all 5! 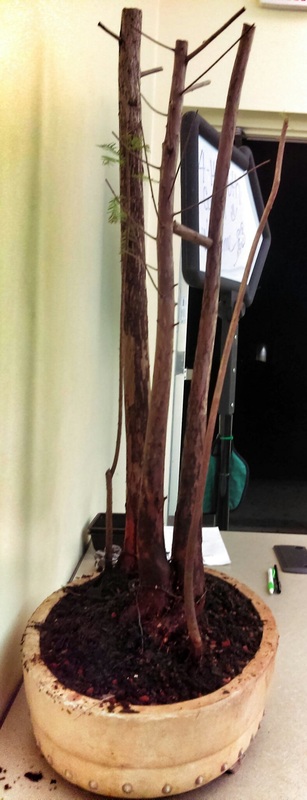 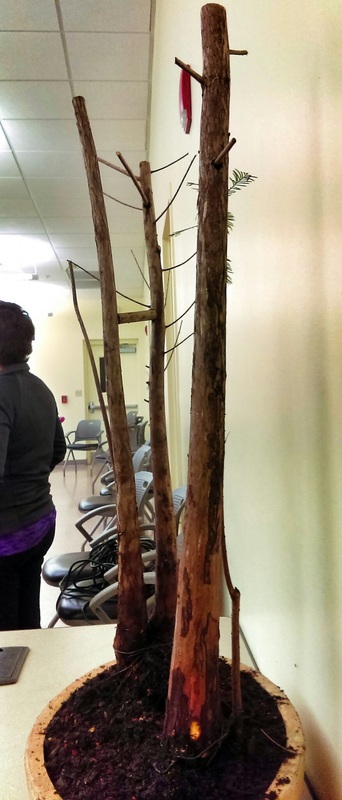 And here is the front. I love the way it turned out and can't wait to see what it looks like all full and grown out! 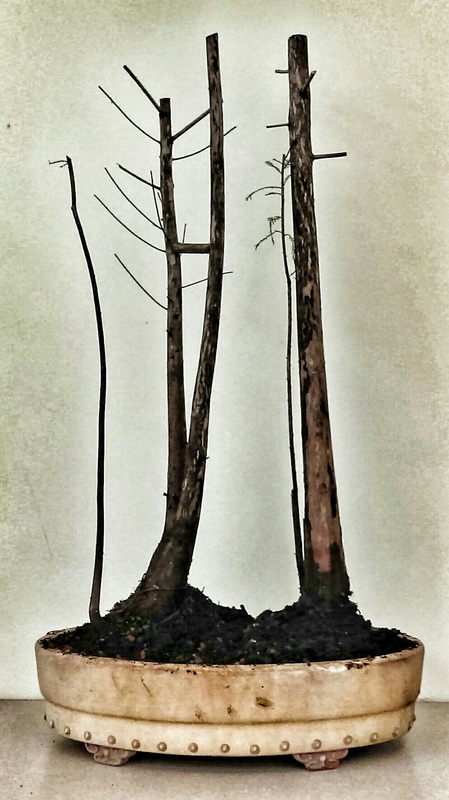 |
Ben jamin LorberI LOVE Bonsai!! I have participated in many styling competitions and have even won! I have also displayed many trees in many exhibits! Archive
June 2017
My Bonsai FlickrCategories
All
If you aren't getting email updates from the blog... Contact me by either commenting or going to the contact page...

|
 RSS Feed
